Looking for a guilt-free dessert that satisfies your sweet tooth and actually helps you hit your macros? This Ninja Creami Mint Chocolate Chip Protein Ice Cream is the ultimate solution for those late-night cravings. Whether you’re searching for the best high-protein Ninja Creami recipes or a healthy homemade ice cream, this version is dairy-free, refined sugar-free, and packed with minty flavor. It’s the perfect macro-friendly treat that tastes like a traditional milkshake but supports your fitness goals!

Making easy, healthy Ninja Creami recipes has quickly become my favorite way to satisfy my major sweet tooth while staying on track with my health and fitness goals. If you are anything like me, trying to find that perfect gluten-free sweet treat that is a balance between a low-calorie treat and a high-protein dessert (that actually tastes like a dessert) is the total game-changer for anyone living and maintaining a healthy lifestyle balance.
To hit my goal of 150 grams of protein daily, I usually prioritize whole foods like lean chicken breasts, but I always save room for a macro-friendly protein powder dessert to end the night. This Ninja Creami Mint Chocolate Chip Protein Ice Cream is one of my personal favorites because it delivers an ultra-creamy texture and refreshing mint flavor that makes it hard to believe it’s actually good for you!
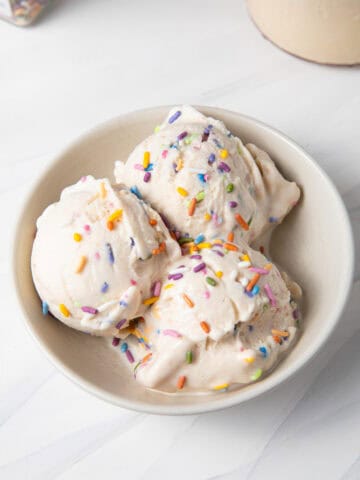
If you love recreating classic flavors in your machine, be sure to try my other dairy-free Ninja Creami recipes, including Peach, Strawberry, Coffee, Chocolate or Vanilla. For a full list of my favorite flavors, check out this post packed with delicious protein-packed Ninja Creami recipes!
Why You’ll Love This Recipe
- It is better for you. The best part about this easy protein ice cream recipe is that it is made with dairy free milk, dye free food coloring, and no added refined sugar, so it is perfect for those on special diets. It can also be gluten-free and vegetarian/vegan friendly too, depending on the protein powder you use.
- It is customizable. You can change the ice cream protein base to suit your preferences by using either chocolate or vanilla protein powder. I like vanilla best, but if you are a chocolate fan, you should definitely try the chocolate protein powder with this recipe!
- It is delicious! And so much more fun than a protein shake and it really is the perfect guilt-free treat!

Ninja Creami Mint Chocolate Chip Protein Ice Cream Ingredients & Tested Substitutions
- Almond Milk. My preference is to use unsweetened almond milk; I like Califia Farms new 3 ingredient organic almond milk, however you may use sweetened or vanilla almond milk if you like. You may also use unsweetened oat milk which will make a nice creamy ice cream.
- Full-fat Coconut Milk. I find the canned coconut milk that works the best has a little bit of guar gum, which is a plant-based thickener. Thai Kitchen & Whole Foods in house brand coconut milk are my personal favorites, but if you’d like to stay away from gums, Trader Joe’s has a great option. I do not recommend using low fat coconut milk as it will make the ice cream base less creamy.
- Medjool Dates. For added sweetness, I use Medjool dates. You may replace them with 1-2 tablespoon of real maple syrup instead if you do not have any on hand.
- Vanilla Bean Paste. To really amp up that classic vanilla flavor, using vanilla bean paste or even whole vanilla beans is preferable. If you don’t have those on hand, vanilla extract is just fine.
- Vanilla Protein Powder. It’s important to note that you should enjoy the taste of your protein powder, or you won’t enjoy the taste of this ice cream! If you don’t have a protein powder you are loyal to, I recommend trying Equip Foods. My personal favorite is their grass fed beef isolate protein because it mixes super well and creates an incredibly creamy texture. You can use PRETTYDELISH to save 15% off your first order.
- Sea Salt. This is optional, but I always like to add a pinch of Celtic sea salt to the ice cream base.
- Dye Free Food Coloring. If you're partial to your mint ice cream being a green color rather than the color of a simple vanilla ice cream base, I like to use Color Kitchen dye free food coloring.
- Dark Chocolate Chips. I prefer to use refined sugar free chocolate gems from Hu Kitchen but you may use whatever type of chocolate chips you like.
- Peppermint Extract. Be sure to use food grade peppermint extract and not an essential oil. You can find mint extracts in most grocery stores or of course on Amazon.

Ninja Creami Mint Chocolate Chip Ice Cream Step By Step Instructions
- Make the ice cream base. Add the almond milk, coconut milk, dates, protein powder, vanilla, peppermint extract, food coloring, and sea salt to a blender. Blend until smooth. You may find that a few small bits of the dates remain if your blender is not high speed; this is ok. You can strain them out or leave them in, it’s up to you.


2. Freeze the ice cream base. Pour base into the ninja creami container right up to the max fill line. Place storage lid on the container and freeze for a minimum of 8 hours. Ninja recommends at least 24 hours, but I don’t have that kind of patience and find that 8 hours is plenty.


3. Mix the ice cream. Once the base is frozen, place pint into the outer bowl ensuring the bottom of the pint is securely in the bowl. Lock the outer bowl lid in place and place bowl assembly into the Ninja Creami motor base, locking it into place. For your first spin you will choose the “Lite Ice Cream” function.
4. Respin. Once the first spin is complete, you will need to respin the ice cream mixture in order for it to become super creamy. My best creami prep tip is to add about 2-3 teaspoon additional almond milk, just enough to cover the top of the pint, before you respin.
5. Add mix ins. After respinning, add the dark chocolate chips to the mint ice cream base, then place back into the Creami machine and choose the "mix-ins" function.


Expert Tips, Tricks & Favorite Mix-Ins
- Be careful not to add too much mint extract! It can be tempting but I found that more than 1 to 1.5 teaspoons can lead to a flavor that is more akin to toothpaste than ice cream. Trust me, even the extra ½ teaspoon makes a huge difference!
- Add chocolate cookie pieces or this Protein Buncha Crunch as mix ins to add more crunch to your ice cream base.
- Swap out the vanilla protein powder for chocolate and add 2 tablespoon of cocoa powder to make dairy free mint chocolate ice cream.
- Ninja’s instructions state that you cannot use the “respin” feature followed by the “mix in” feature. I ALWAYS respin my dairy free ice cream, because it needs this in order to be creamy, and I use the mix in function after with no trouble.
- Before respinning, I recommend always adding a little bit more almond milk, or dairy free milk of choice. Just enough to almost cover the top of the pint container is perfect, about 2-3 teaspoons. This is an easy way to ensure the final result is super creamy.
Ninja Creami Mint Chocolate Chip Protein Ice Cream FAQs
Why is my Ninja Creami Ice Cream crumbly after the first spin?
Don’t panic! This is actually totally normal for high-protein ice cream to be super crumbly! If your pint looks powdery or crumbly, simply add another tablespoon of milk and place it back in the machine and hit the "Re-spin" button for that perfect soft-serve consistency.
How do I get the best mint flavor without it tasting like toothpaste?
The secret is using a small amount of high quality pure peppermint extract. Be careful not to add too much mint extract otherwise it will taste like mint toothpaste. It can be tempting to add more extract, but I found that more than 1 to 1.5 teaspoons can lead to the toothpaste flavor rather than refreshing mint ice cream. Trust me, even the extra ½ teaspoon makes a huge difference!
Do I have to freeze the pint for a full 24 hours?
Not really. Ninja Creami states that the best results with the Ninja Creami blade that a full 24-hour freeze is recommended. However, I am impatient and don't like waiting that long so I have found that 8 hours minimum works just as great to allow the machine to shave the ice into that signature creamy protein ice cream texture.
How many grams of protein are in this Ninja Creami pint?
While it depends on the specific brand of protein powder you use but, most of my Ninja Creami protein recipes pack between 25 and 35 grams of protein per pint. It’s the ultimate macro-friendly dessert for hitting your daily goals!
Can I make this recipe without a Ninja Creami?
This specific recipe was made for the Ninja Creami’s unique shaving technology. While you could try freezing it in ice cube trays and blending it in a high-speed blender, I can't guarantee that the texture would turn out as fluffy or "scoopable" as the Creami version.
How To Store Dairy Free Mint Chocolate Protein Ice Cream
If you do not finish your pint in one sitting, smooth over the ice cream that is left in the container with the back of a spoon. Place the lid back on and freeze. You will need to run the leftovers back through the same steps in the Ninja Creami when you are going to enjoy it again. Note that if you added mix ins, the machine will end up pulverizing them!

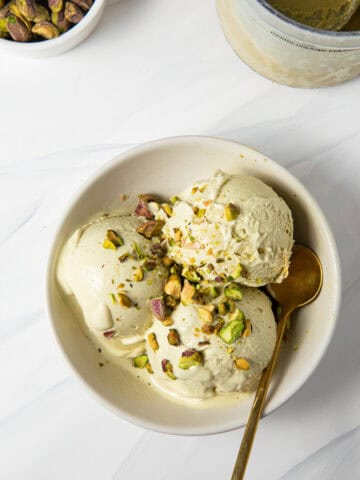
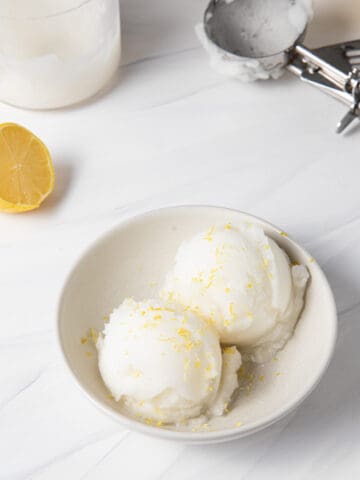
More High Protein Ninja Creami Recipes You Might Enjoy
If you're as addicted to making homemade ice cream as I am, I know you will love these simple ninja creami healthy recipes the next time you're in need of a refreshing homemade treat!
- Classic Chocolate Ice Cream
- Chocolate Cookies & Cream
- Classic Vanilla Ice Cream
- Buncha Crunch Ice Cream
- Peach Cobbler Ice Cream
- Cereal Milk Ice Cream
- Single Serve Chocolate Peanut Butter Protein Ice Cream
- Copycat Klondike Protein Ice Cream Bars
Did you have a chance to make this recipe? If so, please leave me a 5 star rating and review below. I always love and appreciate hearing from you!

Ninja Creami Mint Chocolate Chip Protein Ice Cream
Equipment
- Ninja Creami Machine
- Blender
Ingredients
- 1 cup almond milk
- ¾ cup full fat coconut milk
- 2 medjool dates , or 1-2 tablespoon of real maple syrup
- 1 scoop vanilla protein powder
- 1 pinch sea salt
- 1 teaspoon vanilla extract
- ½ teaspoon peppermint extract
- 1-2 teaspoon dye free green food coloring optional for color
- 1-2 tablespoon dark chocolate chips
Instructions
- Make the ice cream base. Add the almond milk, coconut milk, dates, protein powder, vanilla, peppermint extract, food coloring & sea salt to a blender. Blend until smooth. You may find that a few small bits of the dates remain if your blender is not high speed; this is ok. You can strain them out or leave them in, it’s up to you.
- Freeze the ice cream base. Pour base into the ninja creami container right up to the max fill line. Place storage lid on the container and freeze for a minimum of 8 hours. Ninja recommends at least 24 hours but I don’t have that kind of patience and find that 8 hours is plenty.
- Mix the ice cream. Once the base is frozen, place pint into the outer bowl ensuring the bottom of the pint is securely in the bowl. Lock the outer bowl lid in place & place bowl assembly into the Ninja Creami motor base, locking it into place. For your first spin you will choose the “Lite Ice Cream” function.
- Respin. Once the first spin is complete, you will need to respin the ice cream mixture in order for it to become super creamy. My best creami prep tip is to add about 2-3 teaspoon additional almond milk, just enough to cover the top of the pint, before you respin.
- Add mix ins. After respinning, add the dark chocolate chips to the mint ice cream base, then place back into the creami machine & choose the "mix-ins" function.
Notes
Expert Tips, Tricks & Favorite Mix-Ins
- Be careful not to add too much mint extract! It can be tempting but I found that more than 1 to 1.5 teaspoons can lead to a flavor that is more akin to toothpaste than ice cream. Trust me, even the extra ½ teaspoon makes a huge difference!
- Add chocolate cookie pieces or this Protein Buncha Crunch as mix ins.
- Swap out the vanilla protein powder for chocolate & add 2 tablespoon of cocoa powder to make dairy free mint chocolate ice cream.
- Ninja’s instructions state that you cannot use the “respin” feature followed by the “mix in” feature. I ALWAYS respin my dairy free ice cream, because it needs this in order to be creamy, and I use the mix in function after with no trouble.
- Before respinning, I recommend always adding a little bit more almond milk, or dairy free milk of choice. Just enough to almost cover the top of the pint container is perfect, about 2-3 tsp. This is an easy way to ensure the final result is super creamy.
How To Store Dairy Free Mint Chocolate Protein Ice Cream
- If you do not finish your pint in one sitting, smooth over the ice cream that is left in the container with the back of a spoon. Place the lid back on & freeze. You will need to run the leftovers back through the same steps in the Ninja Creami when you are going to enjoy it again. Note that if you added mix ins, the machine will end up pulverizing them!
Marie says
Yum! This was SO GOOD! My husband and I could not stop raving about it as we ate! Off to grab some of your other creami recipes!
prettydeliciouslife says
Oh I am so happy to hear that you both enjoyed it! You'll have to let me know if you find another favorite! 🙂