The next time you're craving homemade ice cream, make this creamy Strawberry Ice Cream in your Ninja Creami ice cream maker. This easy Ninja Creami recipe uses 6 simple ingredients that are dairy free, refined sugar free and pack a protein punch into this delicious frozen treat.
With a perfectly creamy texture and loads of flavor thanks to the addition of fresh strawberries, it's the perfect sweet treat that you'd never know was good for you, too!

Healthy Ninja Creami recipes have become my favorite desserts to make. They're so much better for you than store-bought ice creams and I just love how easy the ninja creami machine is to use, unlike many traditional ice cream makers. This strawberry ice cream is made with real strawberries and wholesome ingredients so it is not only bursting with flavor but it's a dessert you can feel good about finishing all on your own!
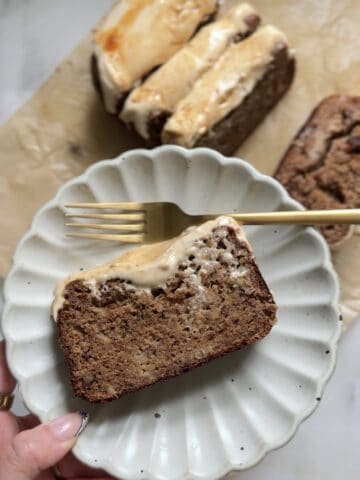
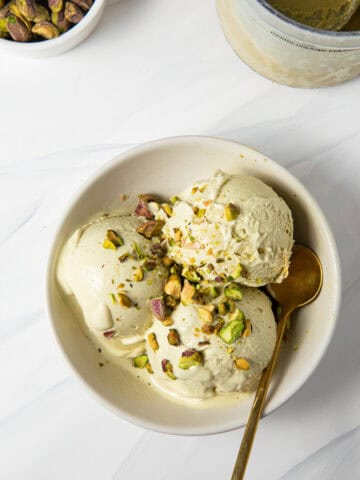
If you're looking for more dairy free protein ice cream recipes, try this Ninja Creami Vanilla Ice Cream, Chocolate Ice Cream, Mint Chocolate Chip, Cookies & Cream, or Coffee Ice Cream. You can check out each of my healthy ninja creami recipes in this round up of favorites.

Why You'll Love This Strawberry Ice Cream Recipe
- It's healthy. Made with just a handful of ingredients like ripe strawberries, protein powder, dairy free milk and sweetened with dates this is a healthy treat that won't spike your blood sugar like traditional ice cream.
- It is super creamy. Unlike most dairy free ice cream, this recipe is super creamy thanks to the mix of full-fat coconut milk and almond milk in the ice cream base.
- It is easy. Making ice cream in the Ninja Creami is the easiest way to enjoy your favorite frozen dessert whenever the craving strikes! The hardest part is the waiting while the ice cream base freezes for at least 8 hours before blending in the Ninja Creami machine.
Please note this post contains affiliate links.

Ninja Creami Strawberry Ice Cream Ingredients & Tested Substitutions
- Almond Milk. If you have access to it, my first choice for almond milk is Califia Farms Organic almond milk. It does not contain any gums or sweeteners which I prefer. If you're in the US you'll likely be able to find it at your local grocery store but if you can't find this brand that's okay, use your favorite almond milk instead. Alternatively you may substitute this for oat milk for an even creamier texture.
- Coconut Milk. I recommend using full fat coconut milk for best results when it comes to the creamy ice cream texture due to the high fat content. I also don't recommend omitting this unless you have an allergy or you're trying to keep the fats low. In that case, you may simply use additional almond milk in its place.
- Vanilla Bean Paste. I like using vanilla bean paste because it enhances the vanilla flavor, however vanilla extract would be a perfectly fine substitute. You could leave it out entirely but I find it enhances the flavor of the strawberries and overall adds nice flavor.
- Dates. I sweeten all of my ninja creami ice cream recipes with dates, but you can swap this out for 1-2 tablespoons of maple syrup, honey or agave if desired.
- Strawberry Protein Powder. For best results when making strawberry protein ice cream I recommend using strawberry protein powder. My favorite brand is Equip Foods; it's made with minimal ingredients that are clean & doesn't have any weird additives. That being said, you may feel free to use your favorite brand of protein powder. If you do not have strawberry protein powder, try using vanilla protein powder and 1-2 tablespoons of strawberry powder for more strawberry flavor.
- Fresh Strawberries. Using fresh strawberries adds additional natural sweetness along with fresh strawberry flavor to both the ice cream base and as a mix in.
Ninja Creami Strawberry Ice Cream Step by Step Instructions
1. Make the ice cream base. Add the almond milk, coconut milk, 4 sliced strawberries, dates, protein powder & vanilla to a blender. Blend until smooth. You may find that a few small bits of the dates remain if your blender is not high speed; this is ok. You can strain them out or leave them in, it's up to you.


2. Freeze the ice cream base. Pour the ice cream base into the ninja creami pint container right up to the max fill line. Place storage lid on the container and place in the freezer on a level surface for a minimum of 8 hours. Ninja recommends at least 24 hours but I don't have that kind of patience and find that 8 hours is plenty.


3. Mix the ice cream. Once the base is frozen, place the ninja pint container in the outer bowl of the Ninja Creami and secure the outer bowl lid on top. Lock the outer bowl in place in the Ninja Creami motor base. For your first spin you will choose the "Lite Ice Cream" function.


4. Respin. Once the first spin is complete, you will need to use the respin function in order for the ice cream to become super creamy. My best Creami prep tip is to add about 2-3 teaspoons of additional almond milk, just enough to barely cover the top of the pint, before you respin.


5. Add mix ins. I like to add 2 additional sliced fresh strawberries as a mix in. Place them on top of the ice cream and re-secure the outer bowl lid. It's okay if the pint container feels very full, you'll still be able to use the mix in function to add the fresh strawberries.


Expert Tips, Tricks & Favorite Mix-Ins
- Always Respin. Ninja's instructions state that you cannot use the "respin" feature followed by the "mix in" feature. I ALWAYS respin my dairy free ice cream, because it needs this in order to be creamy, and I use the mix in function after with no trouble.
- Add More Milk. Before respinning, I recommend always adding a little bit more almond milk, or dairy free milk of choice. Just enough to almost cover the top of the pint container is perfect, about 2-3 tsp. This will help ensure the final result is super creamy.
- Leftovers: If you don't finish your pint, simply smooth out the top so it is flat, put the lid back on, and store it in the freezer. You will just need to run it through the "Lite Ice Cream" spin again when you're ready to enjoy your leftover protein desserts!
- Add-Ins. Add in chocolate chips or white chocolate chips for some extra sweetness and crunch. Just imagine a homemade chocolate covered strawberry ice cream! Or add gluten free golden sandwich cookies (like golden gluten free Oreos) to make a strawberry cookies & cream ice cream. Or my favorite, try my Strawberry Cheesecake Ice Cream variation with only added cream cheese and gluten free graham crackers.
- Toppings. Top with granola and fresh berries and enjoy homemade ninja creami strawberry ice cream for breakfast.
Frequently Asked Questions
Can I use frozen strawberries instead of fresh strawberries?
Yes! Just make sure that you keep the strawberries frozen so it doesn't water down the ice cream base and change the texture.
Why is my ice cream powdery or crumbly after the first spin?
Don’t panic! This is completely normal, especially for dairy-free and lower-fat Ninja Creami recipes. Because there is less sugar and fat than traditional ice cream, the first spin often looks like powdery snow. You just need to add 2-3 teaspoons of almond milk to the pint and run the "Respin" function. It will turn magically creamy!
Do I really have to freeze the ice cream base for 24 hours?
The official Ninja manual recommends a full 24 hours, but let’s be honest, when you want a sweet treat, who has that kind of patience? Not me! I’ve found that 8 hours is usually the sweet spot for a solid freeze, provided your freezer is set to a standard cold temperature. As long as the center isn't liquid, you're good to spin!
Can I use light coconut milk instead of full-fat coconut milk?
You can, but I highly recommend sticking with the full-fat canned coconut milk! Full-fat canned coconut milk provides the essential healthy fats needed to mimic that rich, premium ice cream mouthfeel. It's not the end of the world to use low-fat coconut milk, but using a low-fat or "lite" version can result in a more icy, less creamy consistency once it’s spun.
What if I don't have a blender to break down the dates?
Since this recipe uses Medjool dates as a natural sweetener, a blender is pretty essential to get that base smooth and creamy. If you don't have a blender, you can swap the dates for 1-2 tablespoons of maple syrup and whisk the ingredients together vigorously in a bowl before freezing!

How To Store Leftover Ninja Creami Strawberry Ice Cream
If you do not finish your pint in one sitting, smooth over the ice cream that is left in the container with the back of a spoon. Place the lid back on & freeze. You will need to run the leftovers back through the same steps in the Ninja Creami when you are going to enjoy it again. Note that if you added mix ins, the machine will end up pulverizing them!
More Easy Ninja Creami Ice Cream Recipes You Might Enjoy
- Cookies & Cream or Chocolate Cookies & Cream
- Vanilla
- Chocolate
- Mint Chocolate Chip
- Coffee
- Raspberry Sorbet
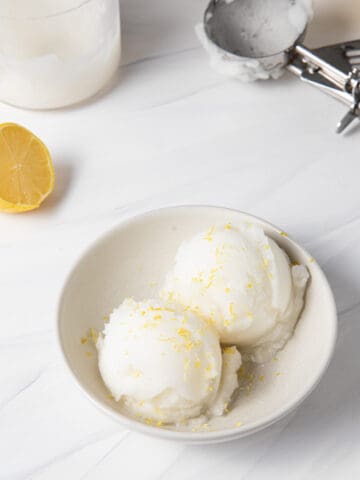
- Lemon Sorbet
- Peanut Butter
- Buncha Crunch
- Kit Kat Banana Split McFlurry
- Even MORE healthy Ninja Creami recipes!
Did you have a chance to make this recipe? If so, please leave me a 5 star rating and review below. I always love and appreciate hearing from you!

Dairy Free Ninja Creami Strawberry Protein Ice Cream
Equipment
- Blender
Ingredients
- ¾ cup almond milk see ingredients section of post for swaps
- ¾ cup full fat coconut milk see ingredients section of post for swaps
- 6 medium strawberries sliced, 4 for the base 2 for mix ins
- 2 dates see ingredients section of post for swaps
- 1 scoop strawberry protein powder see ingredients section of post for swaps
- 1 tablespoon vanilla bean paste or vanilla extract
Instructions
- Make the ice cream base. Add the almond milk, coconut milk, 4 sliced strawberries, dates, protein powder, and vanilla to a blender. Blend until smooth. You may find that a few small bits of the dates remain if your blender is not high speed; this is ok. You can strain them out or leave them in, it's up to you.
- Freeze the ice cream base. Pour the ice cream base into the ninja creami pint container right up to the max fill line. Place storage lid on the container and place in the freezer on a level surface for a minimum of 8 hours. Ninja recommends at least 24 hours but I don't have that kind of patience and find that 8 hours is plenty.
- Mix the ice cream. Once the base is frozen, place the ninja pint container in the outer bowl of the ninja creami and secure the outer bowl lid on top. Lock the outerbowl in place in the ninja creami motor base. For your first spin you will choose the "Lite Ice Cream" function.
- Respin. Once the first spin is complete, you will need to use the respin function in order for the ice cream to become super creamy. My best creami prep tip is to add about 2-3 teaspoons of additional almond milk, just enough to barely cover the top of the pint, before you respin.
- Add mix ins. I like to add 2 additional sliced fresh strawberries as a mix in. Place them on top of the ice cream and re-secure the outer bowl lid. It's okay if the pint container feels very full, you'll still be able to use the mix in function to add the fresh strawberries.
Notes
- Always Respin. Ninja's instructions state that you cannot use the "respin" feature followed by the "mix in" feature. I ALWAYS respin my dairy free ice cream, because it needs this in order to be creamy, and I use the mix in function after with no trouble.
- Add More Milk. Before respinning, I recommend always adding a little bit more almond milk, or dairy free milk of choice. Just enough to almost cover the top of the pint container is perfect, about 2-3 tsp. This will help ensure the final result is super creamy.
- Leftovers: If you don't finish your pint, simply smooth out the top so it is flat, put the lid back on, and store it in the freezer. You will just need to run it through the "Lite Ice Cream" spin again when you're ready to enjoy your leftover protein desserts!
- Add-Ins. Add in chocolate chips or white chocolate chips for some extra sweetness and crunch. Just imagine a homemade chocolate covered strawberry ice cream! Or add gluten free golden sandwich cookies (like golden gluten free Oreos) to make a strawberry cookies & cream ice cream. Or my favorite, try my Strawberry Cheesecake Ice Cream variation with only added cream cheese and gluten free graham crackers.
- Toppings. Top with granola and fresh berries and enjoy homemade ninja creami strawberry ice cream for breakfast.
Leave a Reply