If you are a serious coffee lover looking for the perfect healthy treat, you should make this best Dairy Free Ninja Creami Coffee Protein Ice Cream. This homemade coffee ice cream has six wholesome ingredients like protein powder and full-fat coconut milk. This protein ice cream recipe helps you hit your daily protein goals while still delivering an ultra-creamy, decadent dessert. Get your caffeine kick and satisfy your sweet tooth all in one scoop.

If you have tried any of my other Ninja Creami recipes, you know that it's no secret the Ninja Creami Ice Cream Maker is by far my favorite kitchen appliance that I have ever owned. I resisted getting one for so long, but my husband loved (and still does) ice cream so much he can eat it daily. I wanted a better way to help him satisfy his cravings in a healthier way so I gave in and purchased one. No regrets. The Ninja Creami makes the best dairy free protein ice cream every single time; in fact, I have five pints of ice cream currently in my freezer to be blended whenever we are craving some ice cream.
I've had so much fun creating delicious, healthy ninja creami ice cream recipes like this Single Serve Chocolate Protein Ice Cream, Copycat Protein McFlurry, this Vanilla Protein Cookies & Cream or Chocolate Protein Cookies & Cream or this Protein Vanilla Ice Cream that is perfect when topped with the Viral Olive Oil Caramel Sauce.
Why You'll Love This Ice Cream Recipe
- It is healthier. This coffee ice cream is made with six simple ingredients and is a lighter alternative to store bought ice cream, completely skipping the heavy cream and refined sugars.
- It is delicious. Satisfying your coffee craving and your sweet tooth has never been easier! The robust flavor of coffee paired with the sweetness of coconut sugar and the creamy consistency of coconut milk make for the perfect balance of flavors.
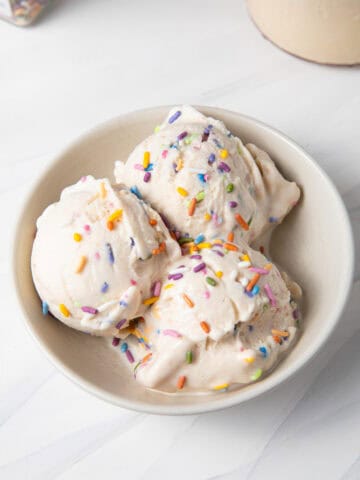
- It is fully customizable. Once you prepare the dairy-free coffee ice cream base, you can fold in favorite mix-ins like gluten-free sandwich cookies or dark chocolate chips to create your own custom flavor experience.

Ninja Creami Coffee Ice Cream Ingredients & Tested Substitutions
- Coconut Milk. I recommend using full fat coconut milk for best results when it comes to the creamy ice cream texture due to the high fat content. I also don't recommend omitting this unless you have an allergy or you're trying to keep the fats low. In that case, you may simply use additional almond milk in its place..
- Almond Milk. I like to add almond milk into the base mixture because it does help to keep the fat content lower, however if you aren't concerned with that then you may omit it and use only coconut milk. I use unsweetened almond milk, but vanilla almond milk would be delicious, too. My personal preference is to use Califia Farms Organic almond milk but as always, please feel free to use your personal favorite. I will note that I do not recommend using shelf stable almond milk, opt for refrigerated for best results.
- Coconut Sugar. Normally I sweeten my ninja creami recipes with medjool dates, however this time I opted for coconut sugar. It is a low glycemic alternative to brown sugar which pairs really beautifully with the bold flavor of coffee.
- Espresso or Coffee. I have an espresso machine so I brewed fresh espresso for my coffee ice cream base. You may use strong coffee instead if you do not have an espresso maker. You can also use store bought cold brew as well. Not a fan of caffeine? Great me either! Decaf coffee works just fine!
- Vanilla Extract. I actually used vanilla bean paste because I find it has a stronger, punchier flavor which I enjoy but if you do not have that on hand vanilla extract works just fine. Alternatively, you can add a touch of maple syrup which is a common substitute for vanilla extract.
- Protein Powder. Using vanilla protein powder or unflavored protein powder from Equip Foods is my personal preference. It's a very clean, easy to digest protein powder made with minimal ingredients that I also find adds even more creminess to the texture of the ice cream. You're welcome to use your favorite brand of protein powder of course, this is just my personal preference that I use in all of my ninja creami recipes.

Ninja Creami Coffee Ice Cream Step by Step Instructions
1. Make the ice cream base. Add the almond milk, coconut milk, coffee or espresso, coconut sugar, protein powder and vanilla to a blender. Blend until smooth.


2. Freeze the ice cream base. Pour base into the ninja creami pint container right up to the max fill line. Place storage lid on the container and freeze for a minimum of 8 hours. Ninja recommends at least 24 hours but I don't have that kind of patience and find that 8 hours is plenty.


3. Mix the ice cream. Once the base is frozen, follow the instructions for placing the pint container in your Ninja Creami machine. For your first spin you will choose the "Lite Ice Cream" function.
4. Respin. Once the first spin is complete, you will need to respin the ice cream mixture in order for it to become super creamy. My best Creami prep tip is to add about 2-3 teaspoons of additional almond milk (just enough to cover the top of the pint) before you hit respin.


Expert Tips, Tricks & Favorite Ice Cream Add-Ins
- Add Chocolate. If you're a fan of coffee-flavored treats but also need your chocolate fix, add 1-2 tbsp. of chocolate chips or 1-2 crushed up gluten free Oreo cookies to make a delicious coffee cookies and cream or coffee chocolate chip flavor. It's the perfect treat!
- Refined Sugar Free Alternative. Looking for a sugar-free alternative to coconut sugar? Sweeten the dairy free coffee ice cream naturally with 2 medjool dates or add a tablespoon of your favorite sugar free sweetener.
- Always Respin. Ninja's instructions state that you cannot use the "respin" feature followed by the "mix in" feature. I ALWAYS respin my dairy free ice cream, because it needs this in order to be creamy, and I use the mix in function after with no trouble.
- Add More Milk. Before respinning, I recommend always adding a little bit more almond milk, or dairy free milk of choice. Just enough to almost cover the top of the pint container is perfect, about 2-3 tsp. This will help ensure the final result is super creamy.
- Leftovers: If you don't finish your pint, simply smooth out the top so it is flat, put the lid back on, and store it in the freezer. You will just need to run it through the "Lite Ice Cream" spin again when you're ready to enjoy your leftover protein desserts!
FAQs of Homemade Ninja Creami Coffee Ice Cream
Do I really need to freeze the base for the full 24 hours?
While the official Ninja Creami instructions recommends waiting a full 24 hours, I don't have the patience for that so I have found that eight hours is typically plenty of time to get a solid, even freeze for this specific dairy-free base.
Why is my ice cream powdery or crumbly after the first spin?
Don’t panic! This is completely normal, especially for dairy-free and lower-fat Ninja Creami recipes. Because there is less sugar and fat than traditional ice cream, the first spin often looks like powdery snow. You just need to add 2-3 teaspoons of almond milk to the pint and run the "Respin" function. It will turn magically creamy!
Do I really have to freeze the ice cream base for 24 hours?
The official Ninja manual recommends a full 24 hours, but let’s be honest, when you want a sweet treat, who has that kind of patience? Not me! I’ve found that 8 hours is usually the sweet spot for a solid freeze, provided your freezer is set to a standard cold temperature. As long as the center isn't liquid, you're good to spin!
Can I use light coconut milk instead of full-fat coconut milk?
You can, but I highly recommend sticking with the full-fat canned coconut milk! Full-fat canned coconut milk provides the essential healthy fats needed to mimic that rich, premium ice cream mouthfeel. It's not the end of the world to use low-fat coconut milk, but using a low-fat or "lite" version can result in a more icy, less creamy consistency once it’s spun.

How to Store Ninja Creami Ice Cream
If you made this creamy ninja creami coffee ice cream recipe and by some weird chance you don't finish the whole pint in one sitting, first you'll have to let me know what your secret to this much self control is!
To properly store any leftovers, simply smooth over the ice cream that is left in the container with the back of a spoon. Place the lid back on and freeze. You will need to run the leftovers back through steps 3 and 4 in the Ninja Creami when you are going to enjoy it again. Note that if you added mix ins, the machine will end up pulverizing them!
More Protein-Packed Recipes You Might Enjoy:
- Dinner Options. Gluten Free McChicken Sandwich, easy slow cooker Pulled Pork, or whip up this Lobster Ravioli which is a fan favorite!
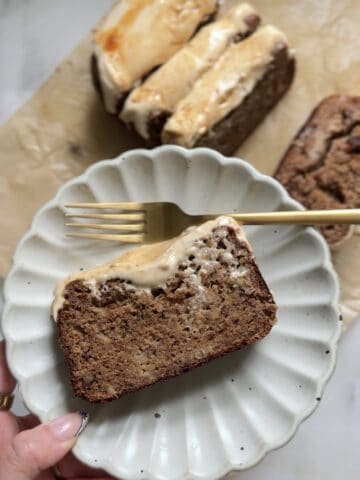
- Dessert Add-ons. Serve the coffee ice cream atop these gluten free Banana Walnut Brownies or Brownie Pudding for a decadent date night dessert or crumble these Monster Cookie Protein Balls on top for a little crunch! Or, top this easy 3 Ingredient Cake Mix Mug Cake with a scoop for a truly delicious treat!
- Other Creami Flavors. Explore all of the rest of the Ninja Creami recipes I have to offer in this roundup!
- Add Toppings. Drizzle with caramelized banana or pumpkin spice latte syrups for extra flavor!
Did you have a chance to make this recipe? If so, please leave me a 5 star rating and review below. I always love and appreciate hearing from you!

Dairy Free Ninja Creami Coffee Ice Cream with Protein
Equipment
- Blender
- Ninja Creami Ice Cream Maker
- Ninja Creami Pint Container
Ingredients
- 1 cup almond milk
- ½ cup full fat coconut milk
- ½ cup espresso or strong coffee if you like a stronger coffee flavor, use ¾ cup coffee and ¾ cup almond milk
- 1 teaspoon coconut sugar
- 1 tablespoon vanilla extract
- 1 scoop vanilla protein powder
Instructions
- Make the ice cream base. Add the almond milk, coconut milk, coffee or espresso, coconut sugar, protein powder and vanilla to a blender. Blend until smooth.
- Freeze the ice cream base. Pour base into the ninja creami pint container right up to the max fill line. Place storage lid on the container and freeze for a minimum of 8 hours. Ninja recommends at least 24 hours but I don't have that kind of patience and find that 8 hours is plenty.
- Mix the ice cream. Once the base is frozen, follow the instructions for placing the pint container in your Ninja Creami machine. For your first spin you will choose the "Lite Ice Cream" button.
- Respin. Once the first spin is complete, you will need to respin the ice cream mixture in order for it to become super creamy. My best creami prep tip is to add about 2-3 teaspoon additional almond milk, just enough to cover the top of the pint, before you respin.
- Add mix ins. If you'd like you can add 1-2 tbsp. chocolate chips or 1-2 of crushed gluten free Oreos for some chocolate crunch.
Notes
- Ninja's instructions state that you cannot use the "respin" feature followed by the "mix in" feature. I ALWAYS respin my dairy free ice cream, because it needs this in order to be creamy, and I use the mix in function after with no trouble.
- Before respinning, I recommend always adding a little bit more almond milk, or dairy free milk of choice. Just enough to almost cover the top of the pint container is perfect, about 2-3 tsp. This will help ensure the final result is super creamy.
- If you do not finish your pint in one sitting, smooth over the ice cream that is left in the container with the back of a spoon. Place the lid back on and freeze. You will need to run the leftovers back through the same steps in the Ninja Creami when you are going to enjoy it again. Note that if you added mix ins, the machine will end up pulverizing them!
Tiffany says
So creamy and easy to make!
Marie says
This is delicious! I kept trying to get the coffee flavor down but the flavor fell flat. This is so good. We now have your Mint Chocolate Chip, Chocolate, and Coffee in rotation! Will try others soon. Can you maybe do an apple pie one!?
prettydeliciouslife says
Hi Marie! Oh I'm so happy to hear it! I can definitely do an apple pie one, I'll add it to my list!
Katie says
Hi! How many grams is your scoop of protein powder?
prettydeliciouslife says
Hi! I'm unsure of the grams but my scoop of protein powder is 1/4 cup; I hope that helps!
Dana Salt says
Do you add instant coffee or brewed coffee?
prettydeliciouslife says
Hi Dana! I usually add brewed coffee or a coffee concentrate 🙂
Linda says
Hi, I was wondering if I can use regular almond milk? My store didn't have the unsweetened one, so I bought regular. I read we are not supposed to use sweetened. Have you used the sweetened almond milk before?
prettydeliciouslife says
Hi Linda! Sweetened almond milk will definitely work, it's really just a personal preference whether you use sweetened or unsweetened. It won't change the texture! 🙂
TYYHyRvY says
TYYHyRvY