
These adorable gluten free Halloween mummy cookies are the perfect combination of spooky and sweet! Made with almond flour, coconut flour, cocoa powder, and maple syrup, these soft, fudgy chocolate cookies are decorated with white frosting and candy eyes to create the cutest little mummies. They're easy to make, fun to decorate, and perfect for Halloween parties!
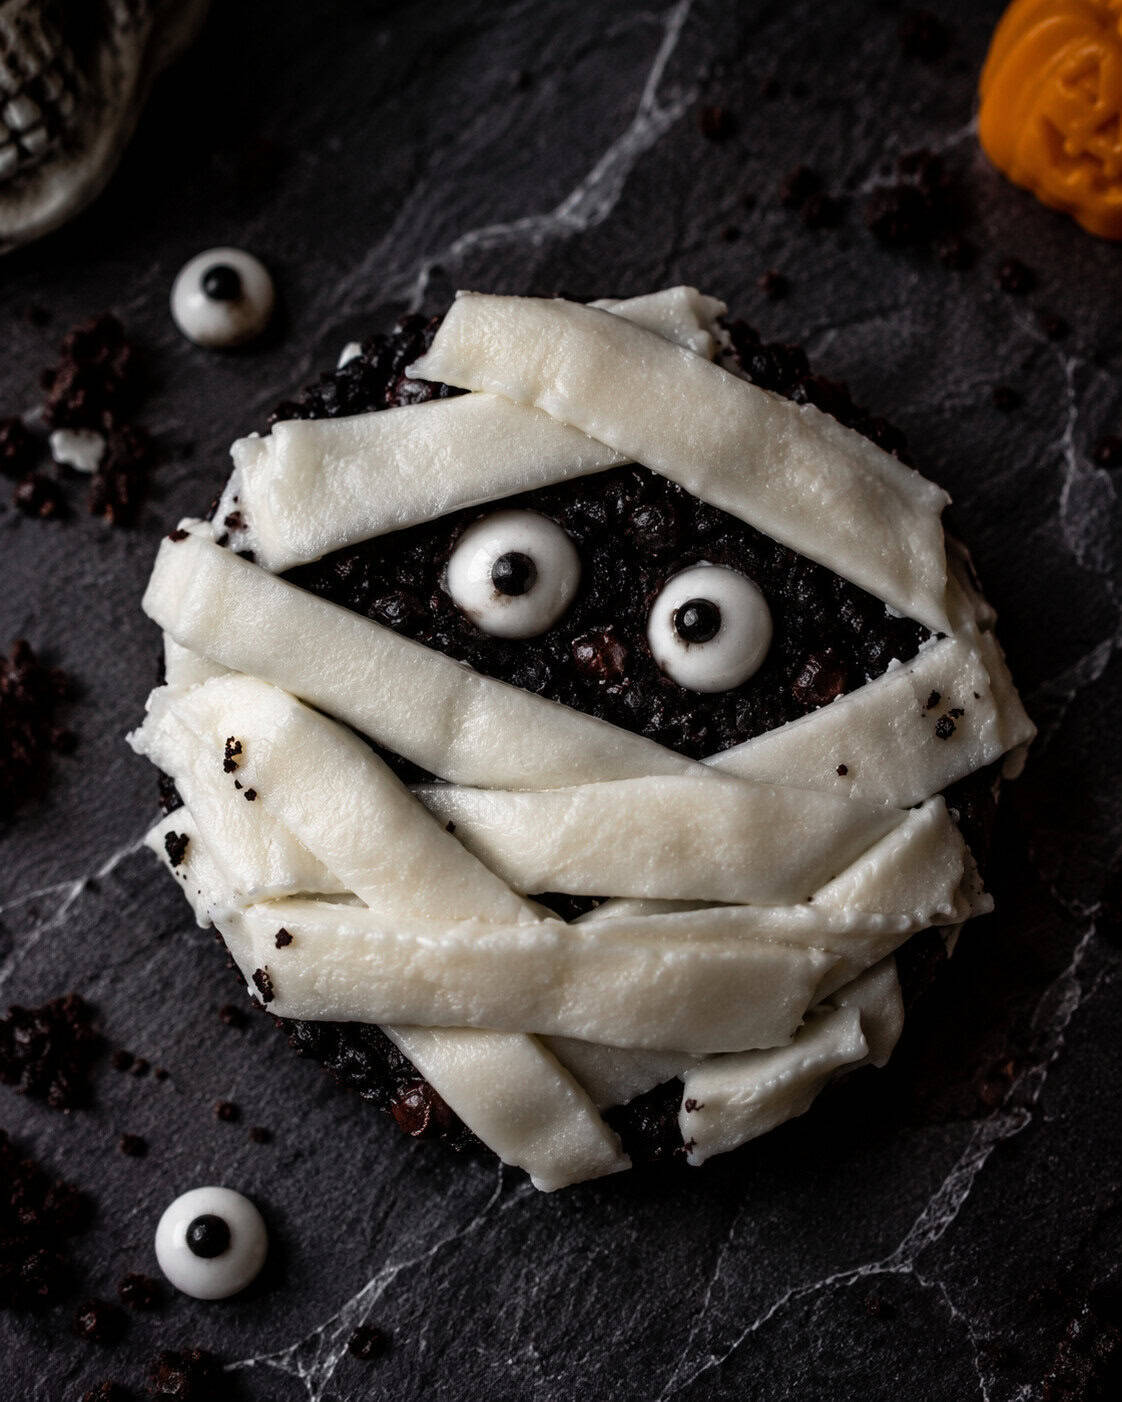
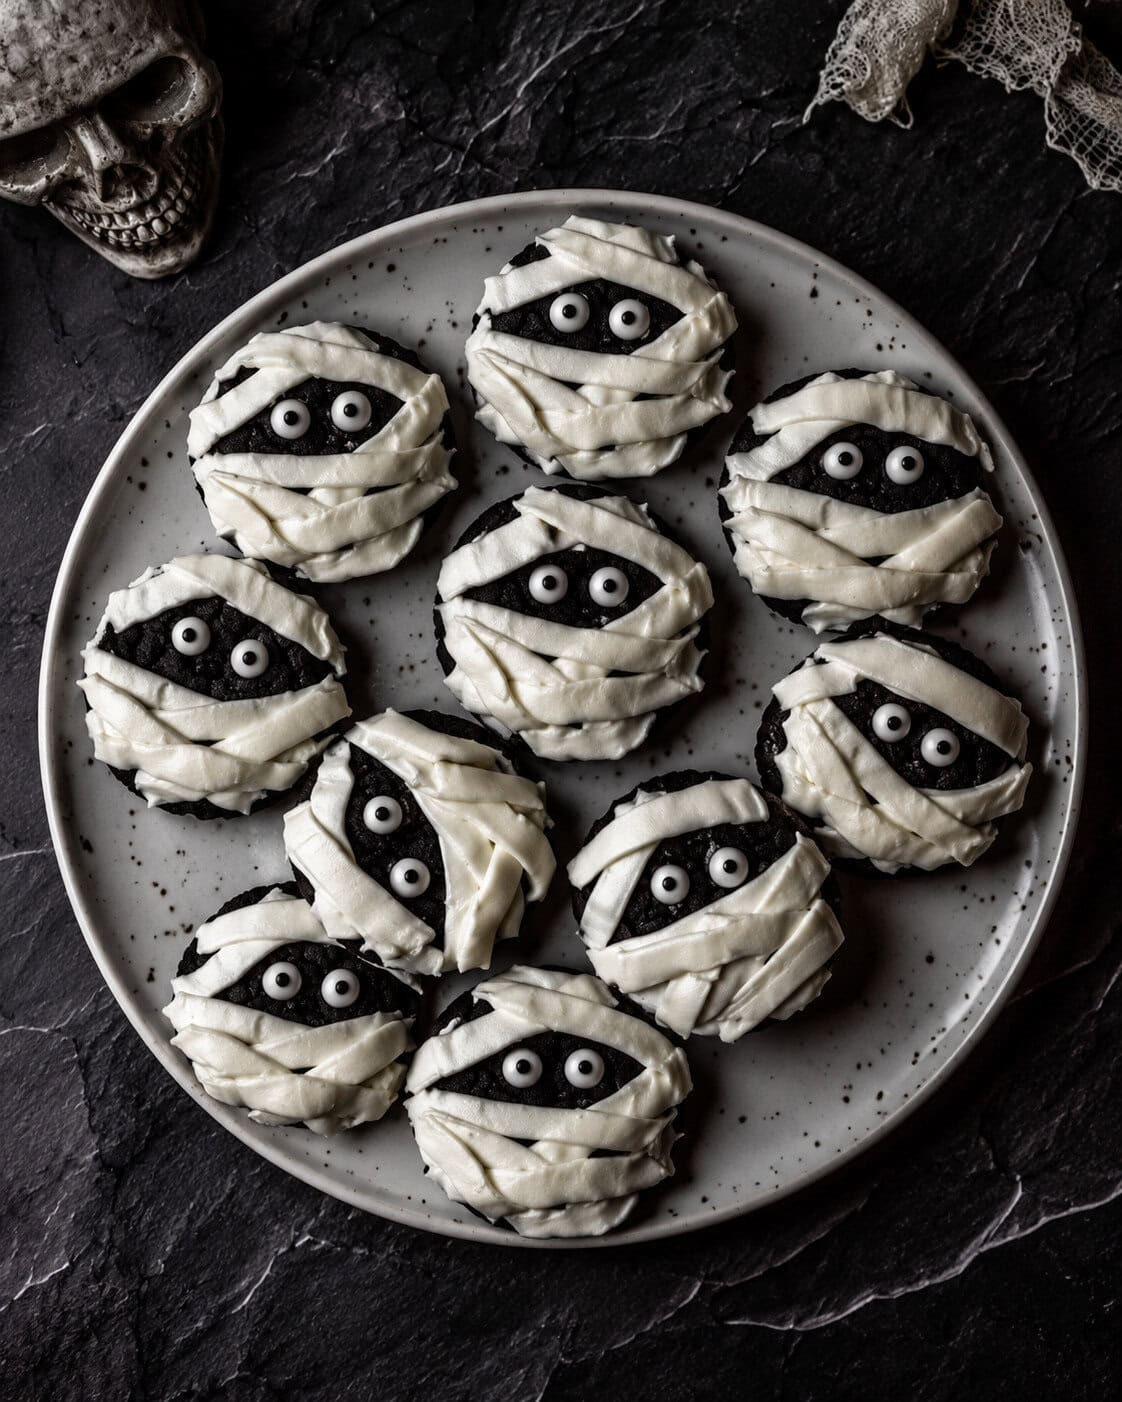
One of my favorite things about this Halloween cookie recipe is that you can make two different spooky treats from the same batch of cookie dough. Turn some into creepy mummy cookies with frosting bandages, and decorate the rest with candy eyeballs to make funny little monsters!
Because I know you want more fun Halloween treats to celebrate spooky season, you should try these Spellbook Brownies, Monster Eye Protein Cookies, Dirt Pudding Cups or these Pumpkin Peanut Butter Cups.
This post may contain affiliate links. If you purchase through one of my links, I may earn a small commission at no additional cost to you. Please see my Privacy Policy for more information.
Why You'll Love These Halloween Mummy Cookies
- Naturally gluten free. These chocolate mummy cookies are made with almond flour and coconut flour instead of traditional all-purpose flour.
- Rich and fudgy. Cocoa powder and dark chocolate chips give these cookies an irresistible chocolate flavor and soft, brownie-like centers.
- Easy to decorate. All you need is white frosting, a piping bag, and edible candy eyes.
- Perfect for Halloween parties. These spooky mummy cookies are a fun addition to any Halloween dessert table.
- Kid-friendly. Little hands will love adding the mummy eyes and creating their own silly monster designs.
Ingredients You'll Need
These Halloween cookies come together with simple ingredients you can find at most grocery stores.
- Almond flour and coconut flour: This gluten-free flour mixture of almond flour & coconut flour creates a soft, tender chocolate cookie without needing traditional all-purpose flour or oat flour.
- Olive oil: Keeps the cookies moist and fudgy without needing melted butter or coconut oil.
- Maple syrup: Naturally sweetens the cookie dough in place of granulated sugar, brown sugar, or coconut sugar.
- Vanilla extract: Enhances the rich chocolate flavor.
- Eggs: Two large eggs help bind the ingredients together and give the cookies structure.
- Cocoa powder: Creates a rich chocolate flavor. Black cocoa is another option if you want an especially dark color.
- Baking soda, baking powder, and salt: Help balance the flavor and texture.
- Dark chocolate chips: Add little pockets of chocolate throughout the cookies.
- White frosting and candy eyes: Turn ordinary chocolate cookies into adorable Halloween treats with white frosting for the mummy wraps and edible candy eyes!
You can find the full recipe with exact measurements in the recipe card below.

How to Make Halloween Mummy Cookies
Making these spooky Halloween cookies is surprisingly simple!
Step 1: Prepare the Cookie Dough
Preheat your oven to 350°F and line two baking sheets with parchment paper or a silicone mat.
In a large bowl or the bowl of a stand mixer, beat the olive oil, maple syrup, vanilla extract, and eggs with an electric mixer until combined.
In a separate bowl, whisk together the dry ingredients. Gradually add the flour mixture to the wet ingredients, mixing until a soft chocolate cookie dough forms. Fold in the chocolate chips.
Step 2: Bake the Cookies
Scoop the dough onto your prepared baking sheet, gently flattening each cookie. Top with additional chocolate chunks and a little sea salt if desired.
Bake for 10–12 minutes, until the edges are set and the centers are still slightly soft. Unlike traditional cookies that turn golden brown, these chocolate cookies will maintain their rich, dark color.
Allow the cookies to cool completely on a wire rack before decorating.
Step 3: Create the Mummy Bandages
Transfer white frosting to a piping bag fitted with a flat icing tip.
Secure two candy eyes near the top of each cookie using a small amount of frosting. Next, pipe overlapping strips of frosting across the mummy body, leaving a gap for the eyes.
The mummy bandages don't need to be perfect! In fact, the messier and more uneven they are, the more fun your creepy mummy cookies will look.
Step 4: Make the Monster Cookies
For an even easier Halloween treat, skip the mummy bandages and attach 3–5 candy eyeballs randomly across the cookie using small dabs of frosting.
These little monsters are especially fun for kids to decorate!
Tips for the Best Halloween Cookies
Cool completely before decorating. Make sure your cookies reach room temperature before adding frosting, otherwise your mummy bandages may melt.
Don't overbake. The cookies should still feel slightly soft when you remove them from the oven. They'll firm up as they cool while maintaining their fudgy centers.
Use a flat piping tip. A flat icing tip creates wide, ribbon-like strips that look like real mummy bandages.
Skip the cookie cutter. These are simple scoop-and-bake cookies, so there's no rolling or cutting required.
Get creative with the decorations. If you're making these for a Halloween party, set out different candy eyes and let everyone decorate their own spooky treats.
Variations and Substitutions
Try white chocolate bandages. Instead of frosting, you can use melted white chocolate for a different take on these chocolate mummy cookies. Melt white chocolate chips in a small microwave-safe bowl in short intervals, stirring until smooth, or use a double boiler. Transfer to a piping bag and drizzle over the cookies. The bandages will be thinner than those made with frosting.
Use different frosting. Vanilla buttercream, cream cheese frosting, or a thick royal icing can all work for decorating. Just make sure the consistency is thick enough to hold the mummy bandages in place.
Make peanut butter monsters. If you love chocolate and peanut butter together, try adding a little peanut butter frosting to your monster cookies for an extra treat.
How to Store Halloween Mummy Cookies
Store your decorated Halloween cookies in an airtight container at room temperature for 1–2 days or in the refrigerator for up to 5 days, depending on the frosting you use.
If stacking the cookies, place parchment paper between layers and avoid pressing down on the frosting decorations.
You can also bake the chocolate cookies ahead of time and wait until the day of your Halloween party to decorate them.
Frequently Asked Questions
Can I make Halloween mummy cookies ahead of time?
Yes! Bake your cookies a day or two in advance, store them in an airtight container, and decorate them closer to serving time for the freshest appearance.
Can I use black cocoa powder?
Yes. Black cocoa gives the cookies an even darker color, which creates a striking contrast against the white mummy bandages. For a more balanced chocolate flavor, try replacing just part of the regular cocoa powder with black cocoa.
The Perfect Spooky Treat for Halloween
Whether you're hosting a Halloween party, making treats with your kids, or just looking for a fun way to celebrate the Halloween season, these gluten free Halloween mummy cookies are sure to be a hit.
They're rich, chocolatey, easy to decorate, and almost too cute to eat!
Did you have a chance to make this recipe? If so, please leave me a 5 star rating and review below. I always love and appreciate hearing from you!

Easy Halloween Mummy Cookies Recipe Gluten Free
Ingredients
- 1 cup almond flour
- ½ cup coconut flour
- ½ cup olive oil
- ½ cup maple syrup
- 1 teaspoon vanilla
- 2 large eggs
- ½ cup cocoa powder
- ½ teaspoon salt
- ½ teaspoon baking soda
- ¼ teaspoon baking powder
- ¼ cup dark chocolate chips/chunks
- sea salt for garnish
For the Decorations
- Edible candy eyes
- Vanilla Frosting
Instructions
- Preheat the oven. Preheat your oven to 350°F and line two baking sheets with parchment paper.
- Mix the wet ingredients. In the bowl of a stand mixer or a large mixing bowl using a hand mixer, beat the olive oil, maple syrup, vanilla extract, and eggs until well combined.
- Combine the dry ingredients. In a separate medium bowl, whisk together the almond flour, coconut flour, cocoa powder, salt, baking soda, and baking powder.
- Make the cookie dough. Gradually add the dry ingredients to the wet ingredients, mixing on low speed until fully incorporated. Using a silicone spatula, fold in the dark chocolate chips.
- Scoop the cookies. Spoon portions of cookie dough onto the prepared baking sheets, leaving space between each cookie. Gently flatten them into round discs, as these gluten-free cookies may not spread much during baking.
- Add toppings. Press a few additional chocolate chunks into the tops of the cookies and sprinkle lightly with flaky sea salt, if desired.
- Bake. Bake for 10–12 minutes, until the cookies are set around the edges but still soft in the centers. They should have a fudgy, brownie-like texture.
- Cool completely. Allow the cookies to cool on the baking sheet for several minutes before transferring to a wire rack. Let them cool completely before decorating.s. Cookies will feel soft and slightly brownie-like.
How to Make Mummy Cookies
- Add the eyes. Place two candy eyes approximately one-third of the way down each cooled cookie, using a small dab of frosting to secure them.
- Prepare the frosting. Transfer white frosting to a piping bag fitted with a flat icing tip.
- Create the mummy bandages. Pipe a slightly crooked X across the top of the cookie, just above the eyes. Continue piping overlapping, crisscrossed strips of frosting across the lower portion of the cookie to resemble mummy bandages.
- Finish decorating. Leave the candy eyes visible between the frosting strips. Repeat with the remaining cookies.
How to Make Monster Cookies
- Attach the candy eyes. Add a small amount of frosting to the back of 3–5 candy eyes.
- Decorate. Arrange the eyes randomly across the top of each cooled chocolate cookie, gently pressing them into place.
- Let the frosting set. Allow the cookies to rest briefly before serving or storing.
Leave a Reply