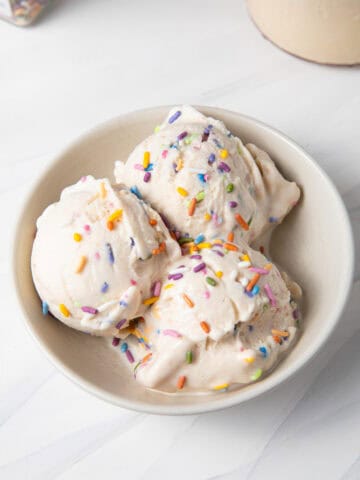
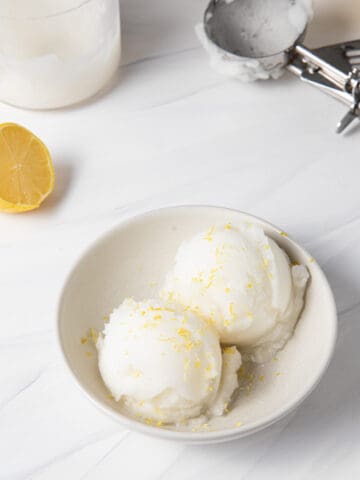
The next time you’re craving a rich, peanut buttery treat, make this protein-packed Ninja Creami Peanut Butter Protein Ice Cream! Made with just a few wholesome, simple ingredients, this recipe is the absolute perfect way to satisfy your sweet tooth with the Ninja Creami ice cream machine. This ice cream is dairy-free, gluten-free, and refined sugar-free which makes it a protein dessert that anyone can enjoy!
This creamy dairy-free peanut butter ice cream is so delicious you’d never know the base was gluten-free, refined sugar-free, and packed with tons of protein! If you are constantly on the hunt for delicious protein snacks and protein desserts that actually taste like a decadent treat, look no further. This high-protein dessert is so much more fun (and satisfying) than a plain protein shake!
If you're a dairy-free ice cream lover like me, then you'll want to try some more of my favorite Ninja Creami recipes! Try more easy classic Ninja Creami ice cream flavors like Vanilla, Strawberry, Chocolate, Mint Chocolate Chip, Cookies & Cream, or Coffee or enjoy fun flavors like this Strawberry Matcha Affogato, Apple Pie, Pistachio, Protein Buncha Crunch Ice Cream , Rocky Road, or make the Viral Cracking Latte by adding a scoop of dairy free vanilla ice cream! It would also be delicious on top of this 3 Ingredient Cake Mix Mug Cake!
Why You'll Love This Peanut Butter Ninja Creami Recipe
- It is packed with protein and satisfies cravings: Making this homemade ice cream one of the absolute best protein desserts to crush those late-night sweet cravings.
- It uses basic ingredients: You likely already have everything you need in your pantry!
- The base is customizable: You can easily swap out flavors to make entirely new protein snacks. Think chocolate or banana protein powder instead of vanilla, both are fantastic swaps!.
- Refined sugar-free: We are sweetening this base naturally with Medjool dates (or maple syrup).
- Easy prep: Just toss everything into a blender, freeze for 8-24 hours, and let the Creami do the hard work!
- It is unbelievably creamy and delicious! No need to explain this.... you just need to try it yourself!
Peanut Butter Ninja Creami Ingredients & Tested Substitutions
Almond Milk. If you have access to it, my first choice for almond milk is Califia Farms Organic almond milk. It does not contain any gums or sweeteners which I prefer. If you're in the US you'll likely be able to find it at your local grocery store but if you can't find this brand that's okay, use your favorite almond milk instead. Alternatively you may substitute this for oat milk for an even creamier texture, soy milk, all coconut milk, or your favorite plant-based milk.
Full-Fat Coconut Milk. I recommend using full fat coconut milk for best results when it comes to the creamy ice cream texture due to the high fat content. I also don't recommend omitting this unless you have an allergy or you're trying to keep the fats low. In that case, you may simply use additional almond milk in its place.
Medjool Dates: Used to naturally sweeten the base and keep it refined sugar-free. You can absolutely substitute this with 1-2 tablespoons of pure maple syrup.
Vanilla Bean Paste. I like using vanilla bean paste because it enhances the vanilla flavor, however vanilla extract would be a perfectly fine substitute. You could leave it out entirely but I find it enhances the flavor of the strawberries and overall adds nice flavor.
Vanilla Protein Powder. It’s important to note that you should genuinely enjoy the taste of your protein powder, or you won’t enjoy the taste of this ice cream! If you don’t have a protein powder you are loyal to, I recommend trying Equip Foods because it mixes super well and creates an incredibly creamy texture.
PBFit Powder: This gives us that massive punch of peanut butter flavor while keeping it light and macro-friendly.
Celtic Sea Salt: Just a pinch to balance the sweetness! If you don't have sea salt, regular table salt will also do the job and still taste amazing!
Peanut Butter Ninja Creami Step by Step Instructions
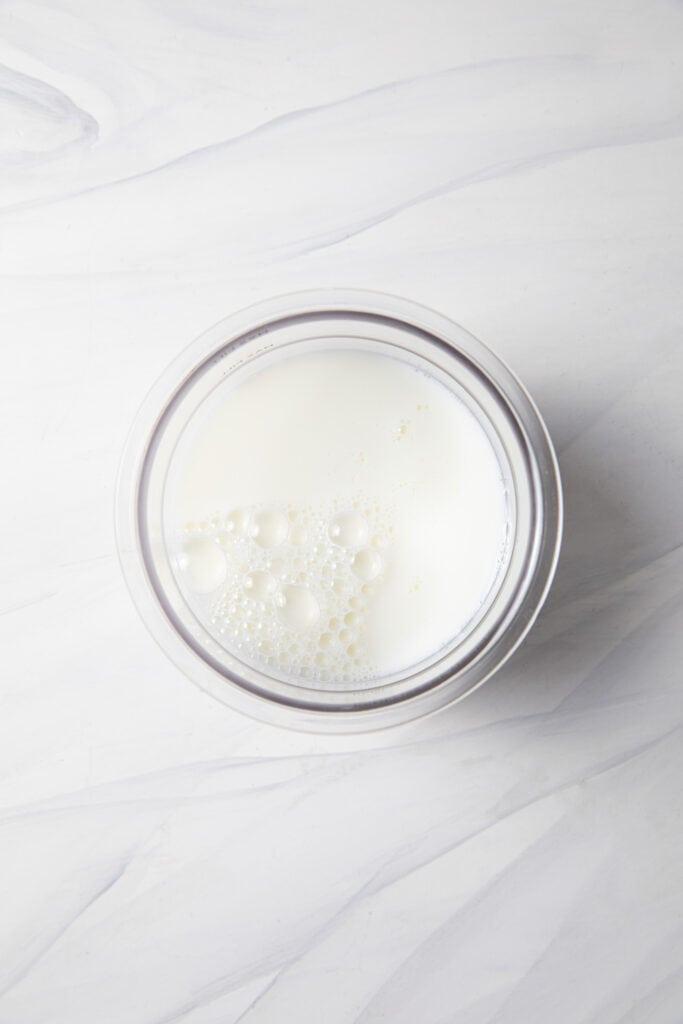
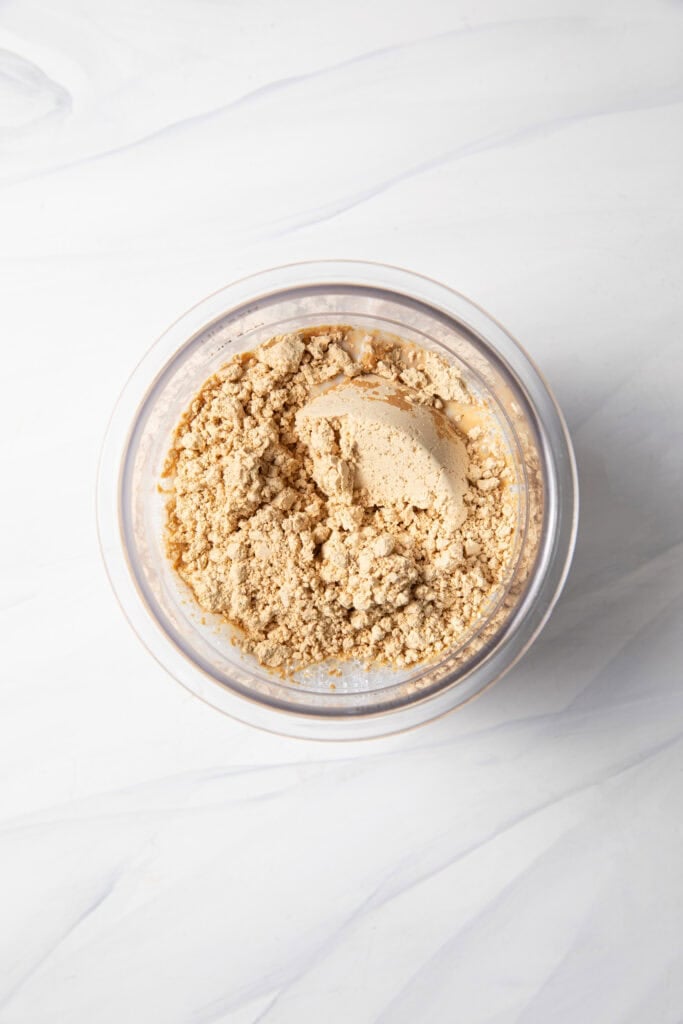
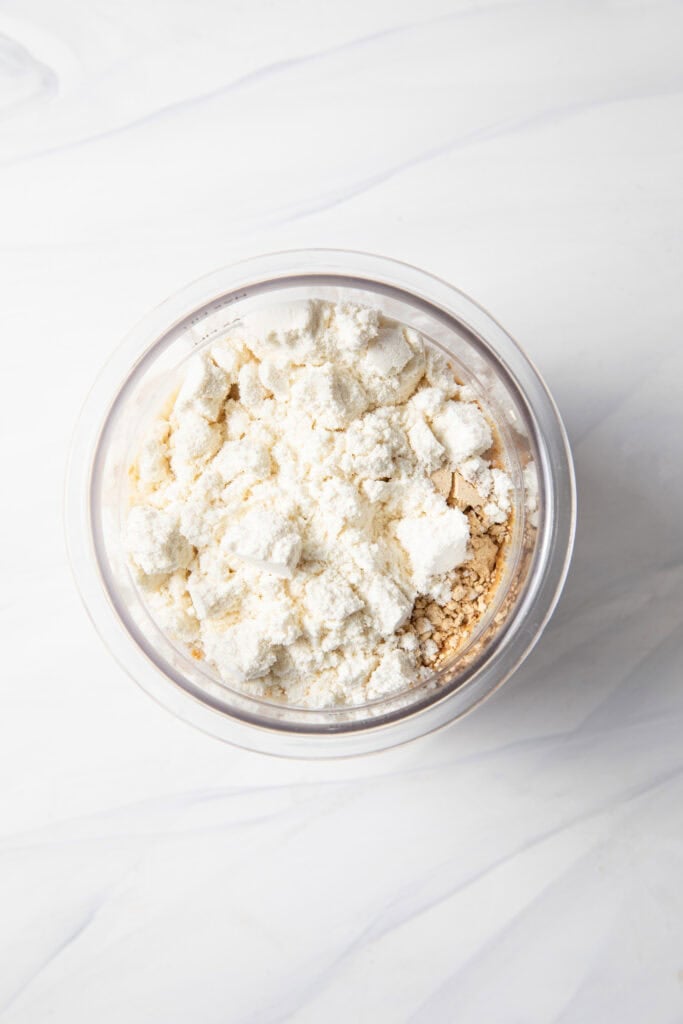
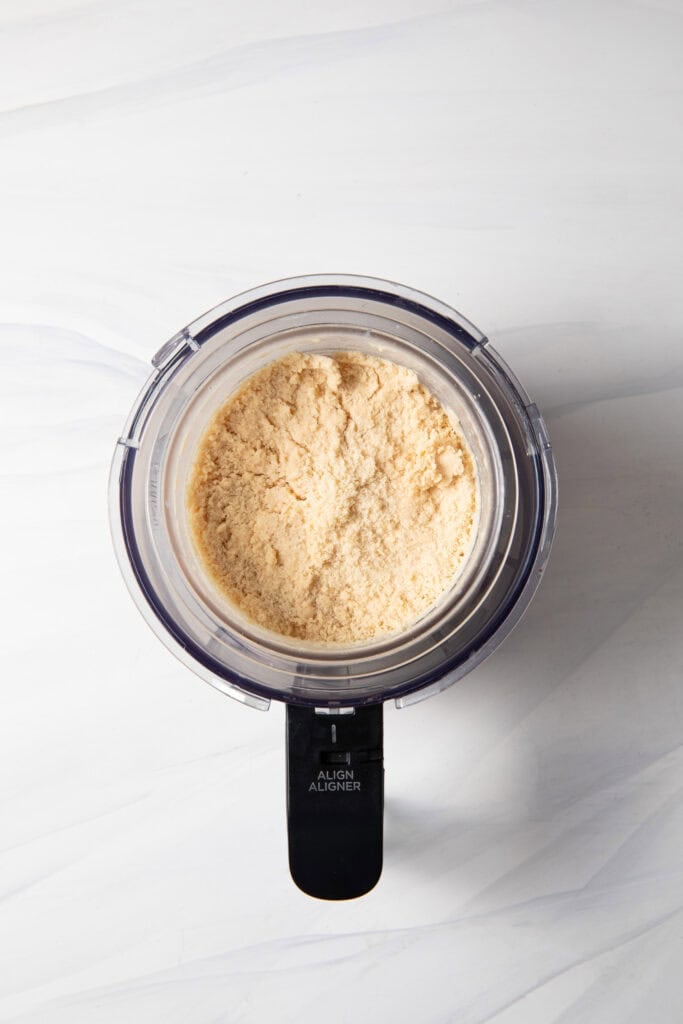
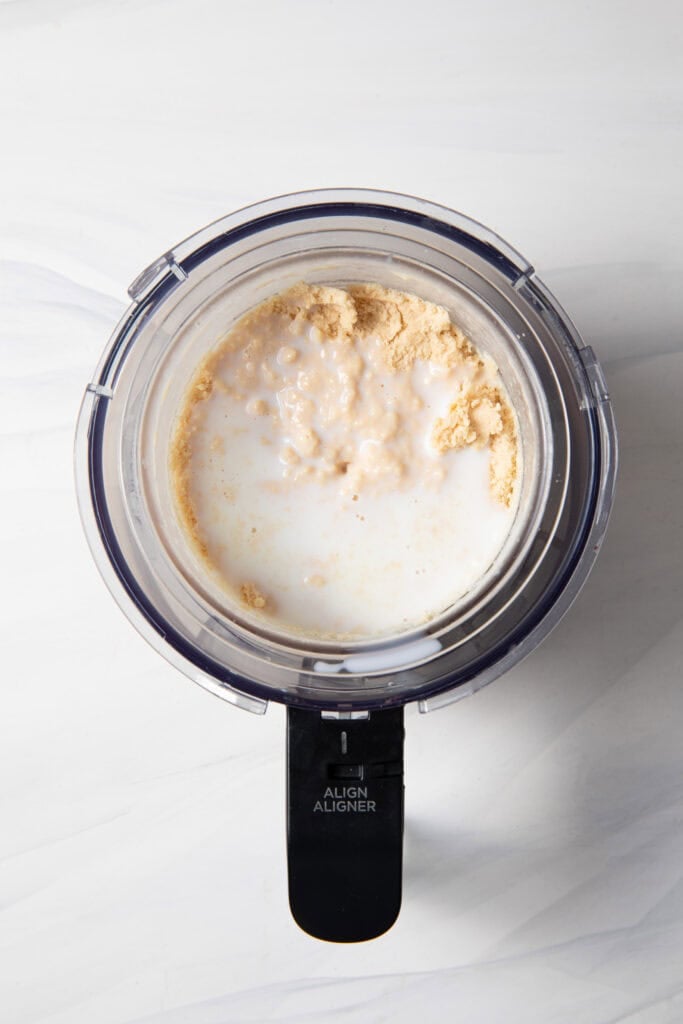
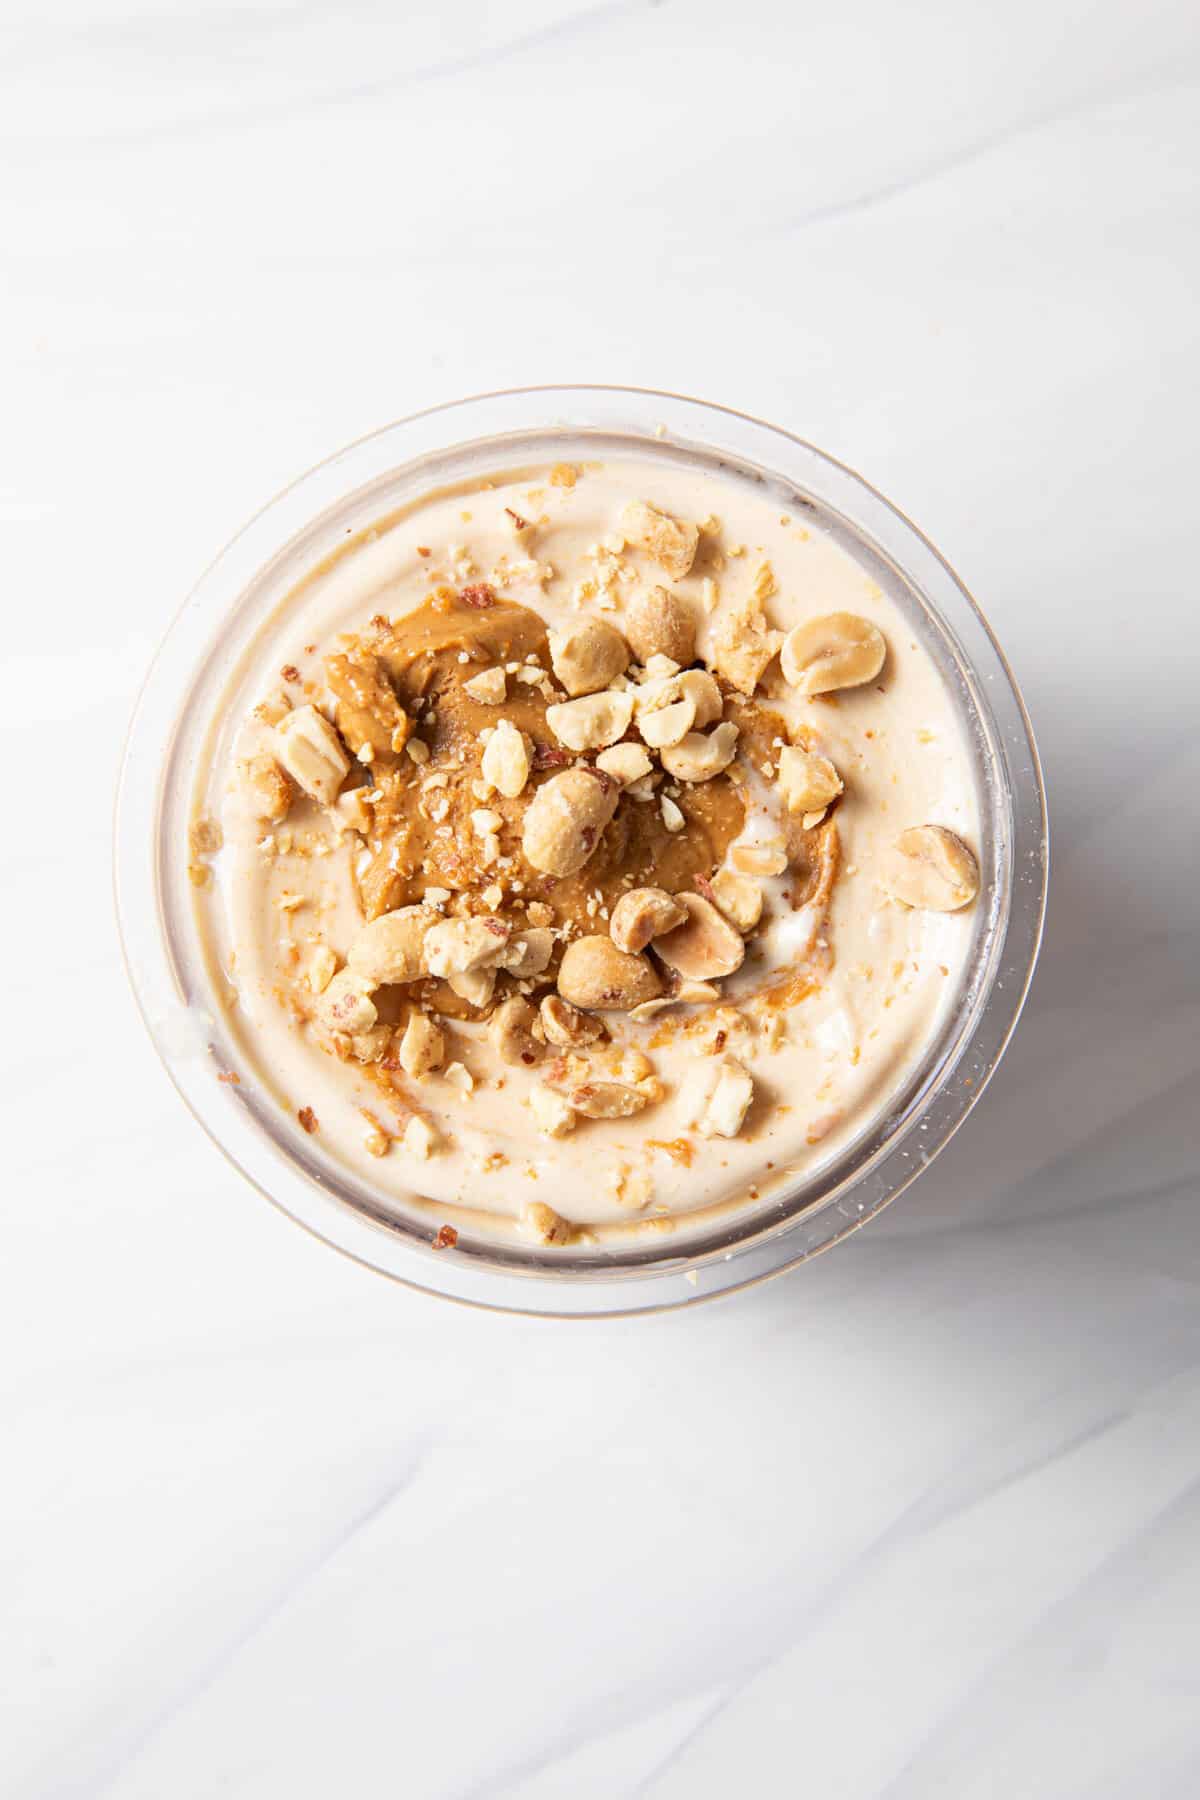
1. Make the ice cream base. Add the almond milk, coconut milk, dates (or maple syrup), protein powder, PBFit, vanilla, and sea salt to a blender. Blend until smooth. You may find that a few small bits of the dates remain if your blender is not high speed; this is okay. You can strain them out or leave them in, it's up to you.
2. Freeze the ice cream base. Pour the base into the Ninja Creami pint container right up to the max fill line. Place the storage lid on the container and freeze for a minimum of 8 hours. Ninja recommends at least 24 hours but I don't have that kind of patience and find that 8 hours is plenty!
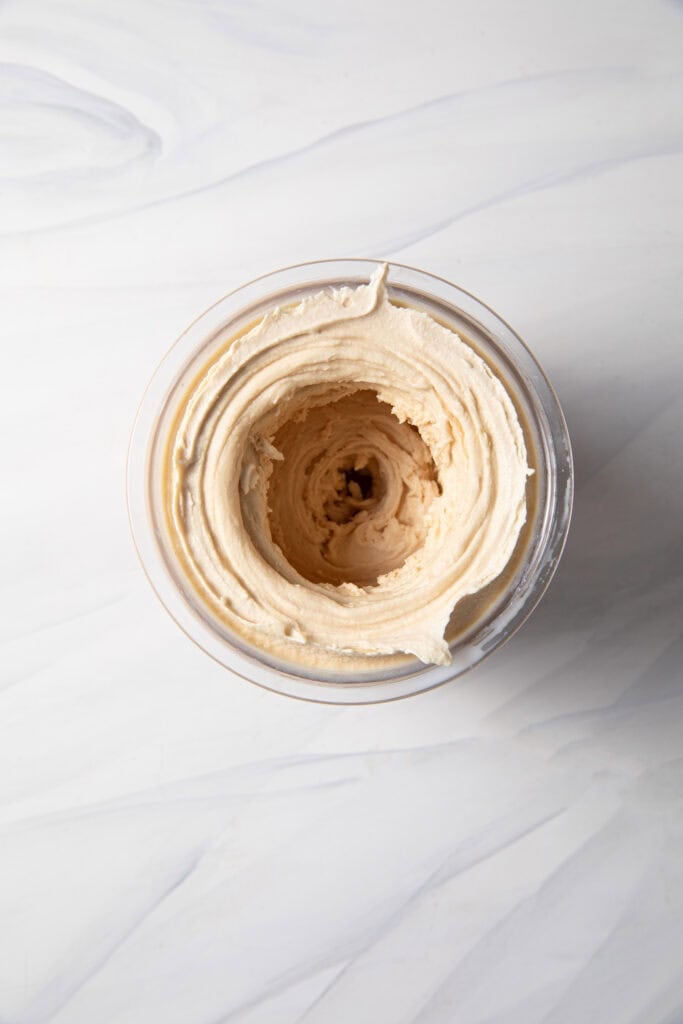
3. Mix the ice cream. Once the base is frozen solid, follow the instructions for placing the pint container into your Ninja Creami machine. For your first spin, you will choose the "Lite Ice Cream" function.
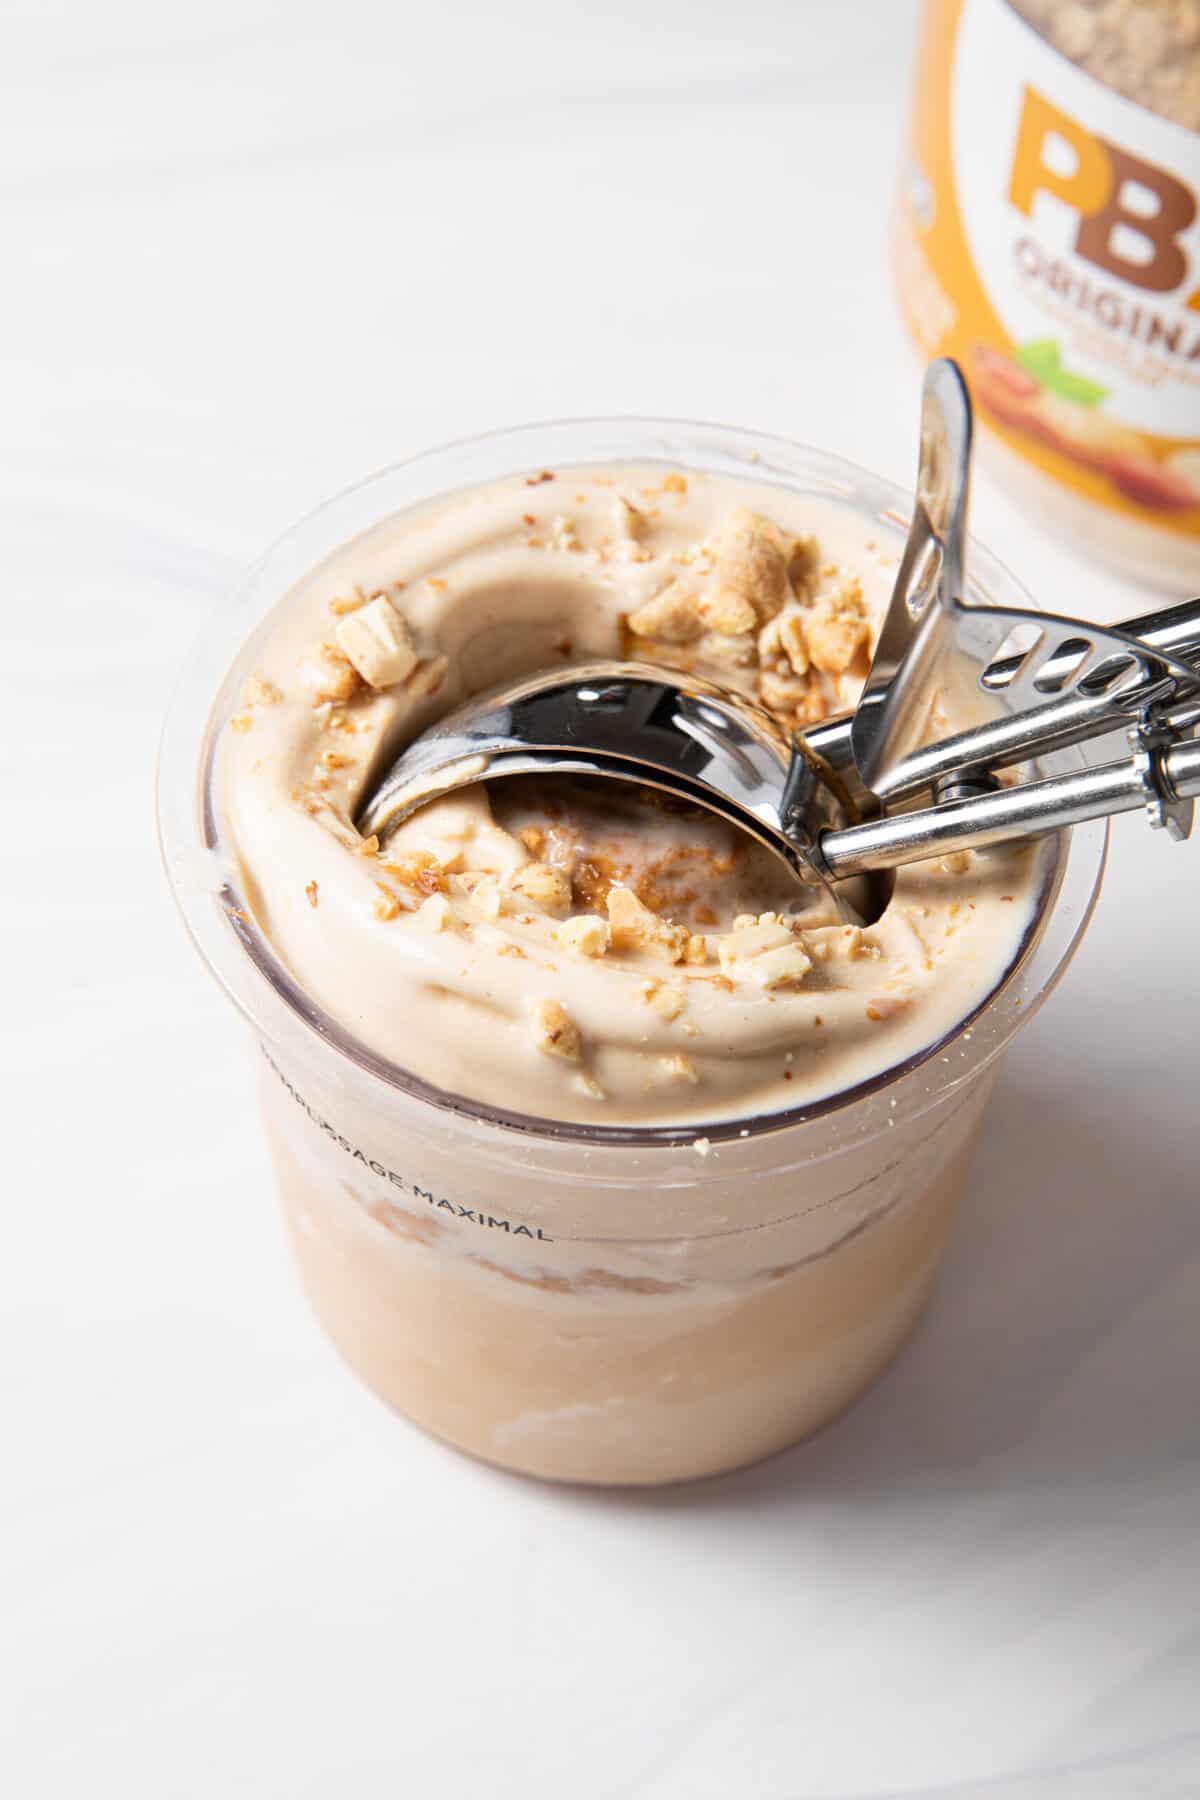
4. Respin. Once the first spin is complete, you will need to respin the ice cream mixture in order for it to become super creamy. My best Creami prep tip is to add about 2-3 teaspoons of additional almond milk (just enough to cover the top of the pint) before you hit respin.
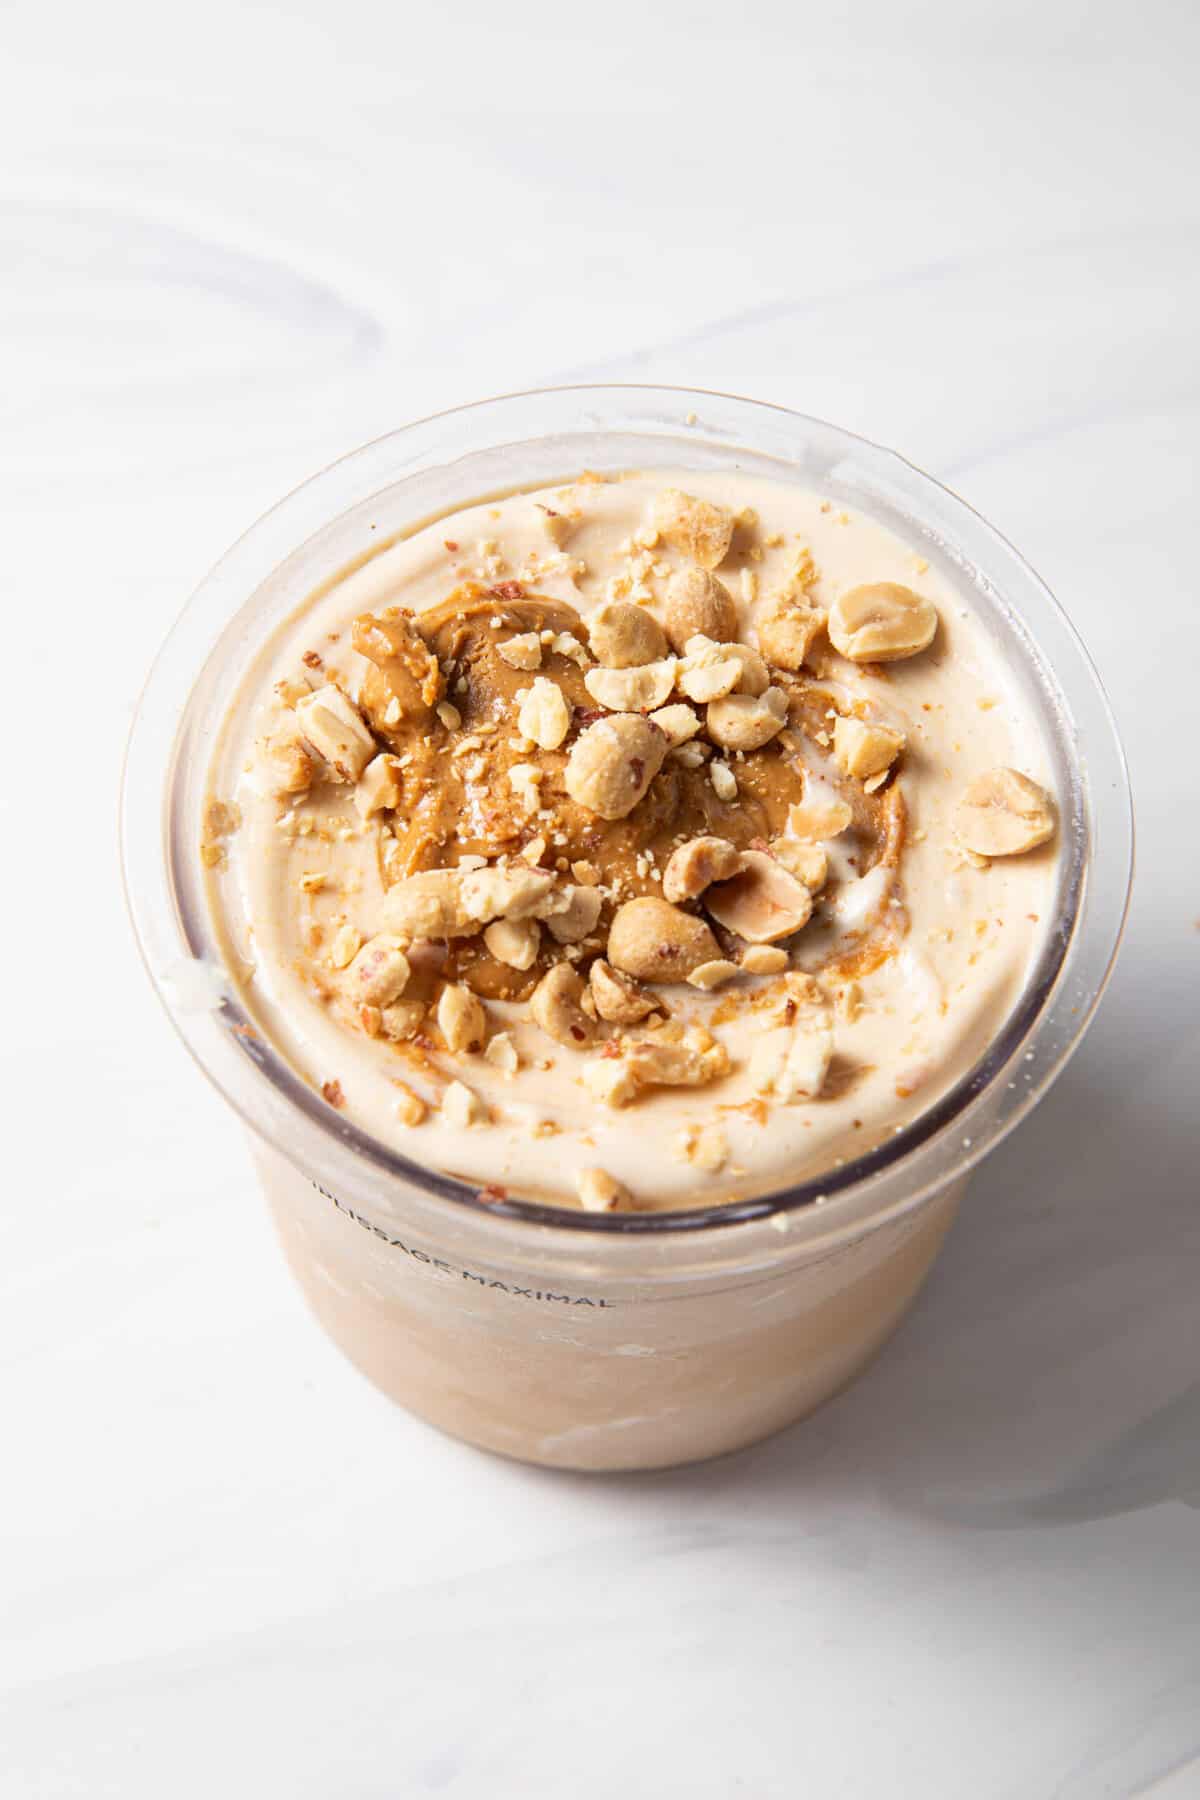
5. Add mix-ins. If you'd like, you can create a small well in the center and add a drizzle of natural peanut butter or a tablespoon of chopped peanuts for some crunch. Run the "Mix-In" function to incorporate! Then enjoy your delicious protein ice cream!!
Expert Tips, Tricks, and Flavor Variations
- Respin. Ninja's instructions state that you cannot use the "respin" feature followed by the "mix in" feature. I ALWAYS respin my dairy free ice cream, because it needs this in order to be creamy, and I use the mix in function after with no trouble.
- Add Milk Before Respin: Before respinning, I recommend always adding a little bit more almond milk, or dairy free milk of choice. Just enough to almost cover the top of the pint container is perfect, about 2-3 tsp. This will help ensure the final result is super creamy.
- Banana Pudding Variation: Want to switch things up and make a dairy-free banana pudding recipe? Swap out the vanilla protein powder for banana protein powder! You can even add a few crushed gluten-free vanilla wafers during the mix-in phase for that classic banana pudding crunch.
- Chocolate Peanut Butter: Swap out the vanilla protein powder for chocolate protein powder to make a rich, dairy-free chocolate peanut butter cup ice cream! Top with some peanut butter cups to tie that chocolate peanut butter combo; this combination is literally life changing!
- Leftovers: If you don't finish your pint, simply smooth out the top so it is flat, put the lid back on, and store it in the freezer. You will just need to run it through the "Lite Ice Cream" spin again when you're ready to enjoy your leftover protein desserts!
Peanut Butter Ninja Creami Ice Cream FAQs
Can I use regular peanut butter instead of PBFit powder?
Yes, you absolutely can! However, using PBFit powder is what keeps this recipe macro-friendly and firmly in the healthy protein snacks or dessert category. If you prefer to use traditional creamy peanut butter, swap the PBFit for 2 tablespoons of regular peanut butter. Just note that it will increase the fat content and change the final texture.
What is the best protein powder to use for Ninja Creami recipes?
My golden rule of making protein desserts in the Ninja Creami is to use a protein powder you actually enjoy the taste of! Since it makes up a big part of the flavor profile, a high-quality brand is key. Both whey and plant-based protein powders work beautifully in this recipe, though plant-based proteins sometimes absorb a bit more liquid and may require an extra respin. I like Equip Foods best for vanilla or chocolate protein powder.
Why is my ice cream powdery or crumbly after the first spin?
Don’t panic! This is completely normal, especially for dairy-free and lower-fat Ninja Creami recipes. Because there is less sugar and fat than traditional ice cream, the first spin often looks like powdery snow. You just need to add 2-3 teaspoons of almond milk to the pint and run the "Respin" function. It will turn magically creamy!
Do I really have to freeze the ice cream base for 24 hours?
The official Ninja manual recommends a full 24 hours, but let’s be honest, when you want a sweet treat, who has that kind of patience? Not me! I’ve found that 8 hours is usually the sweet spot for a solid freeze, provided your freezer is set to a standard cold temperature. As long as the center isn't liquid, you're good to spin!
Can I use light coconut milk instead of full-fat coconut milk?
You can, but I highly recommend sticking with the full-fat canned coconut milk! Full-fat canned coconut milk provides the essential healthy fats needed to mimic that rich, premium ice cream mouthfeel. It's not the end of the world to use low-fat coconut milk, but using a low-fat or "lite" version can result in a more icy, less creamy consistency once it’s spun.
How do I make the peanut butter banana variation mentioned in the tips?
To transform this into a peanut butter banana ice cream combo, swap out the vanilla protein powder for a banana-flavored protein powder. I would add some fresh banana slices to the top of the ice cream after it is done mixing to add a little more banana flavor!
Can I make this recipe completely tree nut free?
Definitely! To turn this into a nut-free protein snack, swap the almond milk for gluten-free oat milk or all coconut milk. Also make sure that the protein powder you use contains no tree nuts, the rest of the ingredients should be naturally tree nut-free!
What if I don't have a blender to break down the dates?
Since this recipe uses Medjool dates as a natural sweetener, a blender is pretty essential to get that base smooth and creamy. If you don't have a blender, you can swap the dates for 1-2 tablespoons of maple syrup and whisk the ingredients together vigorously in a bowl before freezing!
How To Store Peanut Butter Protein Ice Cream
If you have leftover ice cream, use a spoon to smooth out the top so it is completely flat, place the lid back on, and pop it back in the freezer. Because dairy-free protein desserts don't contain preservatives, it will freeze solid. When you're ready to eat it again, just run it through the "Lite Ice Cream" cycle followed by a "Respin" to bring back that perfect texture.
More Protein-Packed Ninja Creami Recipes You Might Enjoy:
- Apple Pie Ninja Creami Protein Ice Cream Dairy Free
- Strawberry Matcha Affogato Green Tea Ice Cream Recipe (Ninja Creami)
- Dairy Free Ninja Creami Peach Protein Ice Cream
- Strawberry Cheesecake Ninja Creami Protein Ice Cream
- Protein Ninja Creami Cherry Berry Smoothie Bowl (DF)
- 3 Ingredient Ninja Creami Cherry Protein Sorbet
- Ninja Creami Protein Chocolate Cookies and Cream
- Ninja Creami Protein Dairy Free Oreo Cookies and Cream Ice Cream

Ninja Creami Peanut Butter Protein Ice Cream
Equipment
- 1 Blender or Food Processor
- 1 Ninja Creami Machine
- 1 Ninja Creami Pint Container
- Measuring Cups + Spoons
Ingredients
Instructions
- Make the ice cream base. Add the almond milk, coconut milk, dates, protein powder, pbfit, vanilla & sea salt to a blender. Blend until smooth. You may find that a few small bits of the dates remain if your blender is not high speed; this is ok. You can strain them out or leave them in, it's up to you.
- Freeze the ice cream base. Pour base into the ninja creami container right up to the max fill line. Place storage lid on the container and freeze for a minimum of 8 hours. Ninja recommends at least 24 hours but I don't have that kind of patience and find that 8 hours is plenty.
- Mix the ice cream. Once the base is frozen, follow the instructions for placing the pint container in your Ninja Creami. For your first spin you will choose the "Lite Ice Cream" function.
- Respin. Once the first spin is complete, you will need to respin the ice cream mixture in order for it to become super creamy. My best creami prep tip is to add about 2-3 teaspoon additional almond milk, just enough to cover the top of the pint, before you respin.
- Add mix ins. If you'd like you can add a drizzle of peanut butter or a tablespoon of chopped peanuts for some crunch.
Notes
- If you want to switch up your flavor profile, you can use chocolate protein powder or banana protein powder!
- Ninja's instructions state that you cannot use the "respin" feature followed by the "mix in" feature. I ALWAYS respin my dairy free ice cream, because it needs this in order to be creamy, and I use the mix in function after with no trouble.
- Before respinning, I recommend always adding a little bit more almond milk, or dairy free milk of choice. Just enough to almost cover the top of the pint container is perfect, about 2-3 tsp. This will help ensure the final result is super creamy.
- If you do not finish your pint in one sitting, smooth over the ice cream that is left in the container with the back of a spoon. Place the lid back on and freeze. You will need to run the leftovers back through the same steps in the Ninja Creami when you are going to enjoy it again. Note that if you added mix ins, the machine will end up pulverizing them!
Leave a Reply