
Fresh peaches swirled with creamy vanilla protein ice cream and topped with gluten free granola, this Dairy Free & Gluten Free Peach Cobbler Ice Cream is made with ease in the Ninja Creami ice cream maker. The perfect homemade ice cream to enjoy during peach season, this delicious dessert is dairy free, gluten free & refined sugar free as well as protein packed!

Making homemade ice cream has never been so easy once I started using my Ninja Creami ice cream machine. I've been spending my summer making tons of healthy ninja creami ice cream recipes, like this Protein Peach Cobbler ice cream especially now that it is peach season. There is nothing better than peaches and ice cream. so I added some more protein into the mix with my vanilla protein ice cream or peach protein ice cream as the base, and now I don't think I can go back. Just imagine sitting outside on a summer evening with a bowl of homemade vanilla ice cream, fresh peaches and gluten free granola- that is my daily experience right now.
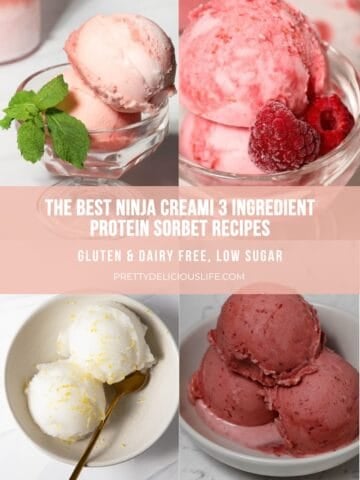
If you're like me and you can't get enough of delicious ice creams, you'll want to check out some of my other ninja creami recipes like this Peach Ice Cream, Strawberry Ice Cream, Watermelon Protein Sorbet, Protein Dole Whip, or this Raspberry Protein Sorbet.
Why You'll Love This Peach Ice Cream Recipe
- It is refreshing. Peach cobbler ice cream is the perfect way to enjoy one of the very best seasonal fruit on a hot summer day.
- It is better for you. This recipe is dairy free, gluten free, refined sugar free and packed with protein so it's a healthy way to indulge while still working towards health & fitness goals.
- It is delicious. Packed with the delicious flavor of fresh, juicy peaches & a touch of sweetness, it's a frozen peaches & cream ice cream delight!

Ninja Creami Peach Ice Cream Ingredients & Tested Substitutions
- Almond Milk. My preference is to use unsweetened almond milk; I like Califia Farms new 3 ingredient organic almond milk, however you may use sweetened or vanilla almond milk if you like. You may also use unsweetened oat milk which will make a nice creamy ice cream.
- Full-fat Coconut Milk. I find the canned coconut milk that works the best has a little bit of guar gum, which is a plant-based thickener. Thai Kitchen & Whole Foods in house brand coconut milk are my personal favorites, but if you’d like to stay away from gums, Trader Joe’s has a great option. I do not recommend using low fat coconut milk as it will make the ice cream base less creamy.
- Medjool Dates. For added sweetness, I use Medjool dates. You may replace them with 1-2 tablespoon of monk fruit sweetener instead if you do not have any on hand or prefer a lower carb option.
- Vanilla Bean Paste. To really amp up that classic vanilla flavor, using vanilla bean paste or even whole vanilla beans is preferable. If you don’t have those on hand, vanilla extract is just fine.
- Vanilla Protein Powder. You could also use peach protein powder for an extra layer of peach flavor. It’s important to note that you should enjoy the taste of your protein powder, or you won’t enjoy the taste of this ice cream! If you don’t have a protein powder you are loyal to, I recommend trying Equip Foods. My personal favorite is their grass fed beef isolate protein because it mixes super well and creates an incredibly creamy texture. You can use PRETTYDELISH to save 15% off your first order.
- Sea Salt. This is optional, but I always like to add a pinch of Celtic sea salt to the ice cream base.
- Fresh, Ripe Peaches. Opt for fresh peaches over frozen in peach season. I do not recommend using canned peaches as they are canned in a sugar syrup.
- Warm Spices. Cinnamon, nutmeg, and ginger beautifully compliment the peach flavor.
- Coconut Sugar. This is a refined sugar free alternative to brown sugar that is used when making the peach cobbler topping to add a touch of sweetness.
- Gluten Free Granola. This adds a delicious crunch to the peach cobbler topping. Find your favorite gluten free granola and use that!
Ninja Creami Peach Cobbler Protein Ice Cream Step by Step Instructions
1. Make the vanilla ice cream base. Add the almond milk, coconut milk, dates, protein powder, vanilla, and sea salt to a blender. Blend until smooth. You may find that a few small bits of the dates remain if your blender is not high speed; this is ok. You can strain them out or leave them in, it’s up to you.


2. Freeze the ice cream base. Pour base into the ninja creami container right up to the max fill line. Place storage lid on the container and freeze for a minimum of 8 hours. Ninja recommends at least 24 hours but I don’t have that kind of patience and find that 8 hours is plenty.


3. Mix the ice cream. Once the base is frozen, follow the instructions for placing the pint container in the motor base of your Ninja Creami machine. For your first spin you will press the “Lite Ice Cream” button.
4. Respin. Once the first spin is complete, you will need to respin the ice cream mixture in order for it to become super creamy. My best creami prep tip is to add about 2-3 teaspoon additional almond milk, just enough to cover the top of the pint, before you respin. Place the outer bowl lid back on, secure in the machine & press the re-spin button.


5. Add mix ins. After respinning, add diced peaches from about ½ of a fresh peach.

6. Prepare topping. Slice the other half of the peach and place the peach slices in a microwave safe bowl. Sprinkle with coconut sugar, cinnamon, or a mixture of warm spices like nutmeg, cinnamon, and ginger. Place the bowl in the microwave and heat for 30 seconds until peaches are warmed. Pour the warm peach cobbler topping over the peaches and ice cream base, and top with a sprinkle of gluten free granola.


Expert Homemade Ice Cream Tips & Tricks
- More Protein Option. If you're aiming for a specific daily protein target, you can add an additional scoop of protein powder. I personally aim for 150 grams of protein a day, so sometimes I'll add 1 more scoop of protein powder to increase the amount of protein.
- Soft Serve Texture. If you prefer more of a soft serve texture, add about a tablespoon of milk before respinning.
- Leftovers: If you don't finish your pint, go ahead and smooth out the top so it is flat, put the lid back on, and store it in the freezer. You will just need to run it through the "Lite Ice Cream" spin again when you're ready to enjoy your leftover protein desserts!
- Respin. Ninja's instructions state that you cannot use the "respin" feature followed by the "mix in" feature. I ALWAYS respin my dairy free ice cream, because it needs this in order to be creamy, and I use the mix in function after with no trouble.
- Add Milk Before Respin: Before respinning, I recommend always adding a little bit more almond milk, or dairy free milk of choice. Just enough to almost cover the top of the pint container is perfect, about 2-3 tsp. This will help ensure the final result is super creamy.
FAQs of Ninja Creami Protein Ice Cream
Do I really need to freeze the base for the full 24 hours?
While the official Ninja Creami instructions recommends waiting a full 24 hours, I don't have the patience for that so I have found that eight hours is typically plenty of time to get a solid, even freeze for this specific dairy-free base.
Can I use the respin and mix-in functions back-to-back?
Okay so hear me out, standard Ninja Creami instructions advise against running these cycles back to back, but I always respin my dairy-free ice cream with a couple teaspoons of almond milk because it needs it to be truly creamy (instead of that powdery ice cream texture). I use the mix-in function right after with no trouble at all.
Why is my ice cream powdery or crumbly after the first spin?
This is completely normal, especially for dairy-free and lower-fat Ninja Creami recipes. Because there is less sugar and fat than traditional ice cream, the first spin often looks like powdery snow. You just need to add 2-3 teaspoons of almond milk to the pint and run the "Respin" function. It is my best tip to success!
Can I use a low-fat milk instead of full-fat coconut milk?
I recommend using the full-fat canned coconut milk; the fats from the coconut milk are what give this dairy-free ice cream that rich, velvety texture we all love from dairy-filled ice cream. By using a low-fat or "lite" version of the coconut milk, it can result in a more icy, less creamy consistency once it’s spun.
Can I make this homemade ice cream without a blender?
Since this recipe uses Medjool dates as the sweetener, a blender is pretty essential to get that base smooth and creamy. If you don't have a blender, you can swap the dates for 1-2 tablespoons of maple syrup and whisk the ingredients together in a bowl before freezing!
What is the best protein powder to use for Ninja Creami recipes?
My golden rule of making protein desserts in the Ninja Creami is to use a protein powder you actually enjoy the taste of! Since it makes up a big part of the flavor profile, a high-quality brand is key. Both whey and plant-based protein powders work beautifully in this recipe, though plant-based proteins sometimes absorb a bit more liquid and may require an extra respin. I like Equip Foods best, but any protein powder should work for this recipe!
How to Store Peach Cobbler Ice Cream
If you do not finish your pint in one sitting, smooth over the ice cream that is left in the container with the back of a spoon so that it has a level surface. Place the lid back on & freeze. You will need to run the leftovers back through the same steps in the Ninja Creami when you are going to enjoy it again. Note that if you added the toppings & mix ins, the machine will end up pulverizing them but the ice cream will still taste just as delicious!
If You Liked This Peach Cobbler Ice Cream Recipe, You Might Also Enjoy These:
- Cottage Cheese with Peaches High Protein Breakfast
- Ninja Creami Peach Protein Ice Cream
- Homemade Maple Almond Vanilla Low Fodmap Granola
- any of these homemade Ninja Creami ice cream recipes
- any of these homemade Ninja Creami sorbet recipes
Did you have a chance to make this recipe? If so, please leave me a 5 star rating and review below. I always love and appreciate hearing from you!

Ninja Creami Peach Cobbler Protein Ice Cream (Dairy Free)
Equipment
- Blender
Ingredients
- 1 cup almond milk
- ¾ cup coconut milk full fat, canned
- 1 scoop vanilla protein powder
- 2 tablespoon vanilla extract
- 1-2 medjool dates can sub 1 tablespoon monk fruit sweetener or maple syrup
- 1 pinch celtic sea salt optional
Mix Ins & Toppings
- 1 medium fresh peach ½ diced, ½ cut into slices
- 1 tsp coconut sugar
- ½ teaspoon cinnamon can also add a pinch of nutmeg & ginger
- 1-2 tablespoon gluten free granola
Instructions
- Make the vanilla ice cream base. Add the almond milk, coconut milk, dates, protein powder, vanilla & sea salt to a blender. Blend until smooth. You may find that a few small bits of the dates remain if your blender is not high speed; this is ok. You can strain them out or leave them in, it’s up to you.
- Freeze the ice cream base. Pour base into the ninja creami container right up to the max fill line. Place storage lid on the container and freeze for a minimum of 8 hours. Ninja recommends at least 24 hours but I don’t have that kind of patience and find that 8 hours is plenty.
- Mix the ice cream. Once the base is frozen, follow the instructions for placing the pint container in the motor base of your Ninja Creami machine. For your first spin you will press the “Lite Ice Cream” button.
- Respin. Once the first spin is complete, you will need to respin the ice cream mixture in order for it to become super creamy. My best creami prep tip is to add about 2-3 teaspoon additional almond milk, just enough to cover the top of the pint, before you respin. Place the outer bowl lid back on, secure in the machine & press the re-spin button.
- Add mix ins. After respinning, add diced peaches from about ½ of a fresh peach.
- Prepare topping. Slice the other half of the peach and place the peach slices in a microwave safe bowl. Sprinkle with coconut sugar, cinnamon, or a mixture of warm spices like nutmeg, cinnamon, and ginger. Place the bowl in the microwave and heat for 30 seconds until peaches are warmed. Pour the warm peach cobbler topping over the peaches and cream ice cream base and top with a sprinkle of gluten free granola.
Notes
- More Protein Option. If you're aiming for a specific daily protein target, you can add an additional scoop of protein powder. I personally aim for 150 grams of protein a day, so sometimes I'll add 1 more scoop of protein powder to increase the amount of protein.
- Soft Serve Texture. If you prefer more of a soft serve texture, add about a tablespoon of milk before respinning.
- Leftovers: If you don't finish your pint, go ahead and smooth out the top so it is flat, put the lid back on, and store it in the freezer. You will just need to run it through the "Lite Ice Cream" spin again when you're ready to enjoy your leftover protein desserts!
- Respin. Ninja's instructions state that you cannot use the "respin" feature followed by the "mix in" feature. I ALWAYS respin my dairy free ice cream, because it needs this in order to be creamy, and I use the mix in function after with no trouble.
- Add Milk Before Respin: Before respinning, I recommend always adding a little bit more almond milk, or dairy free milk of choice. Just enough to almost cover the top of the pint container is perfect, about 2-3 tsp. This will help ensure the final result is super creamy.
Leave a Reply