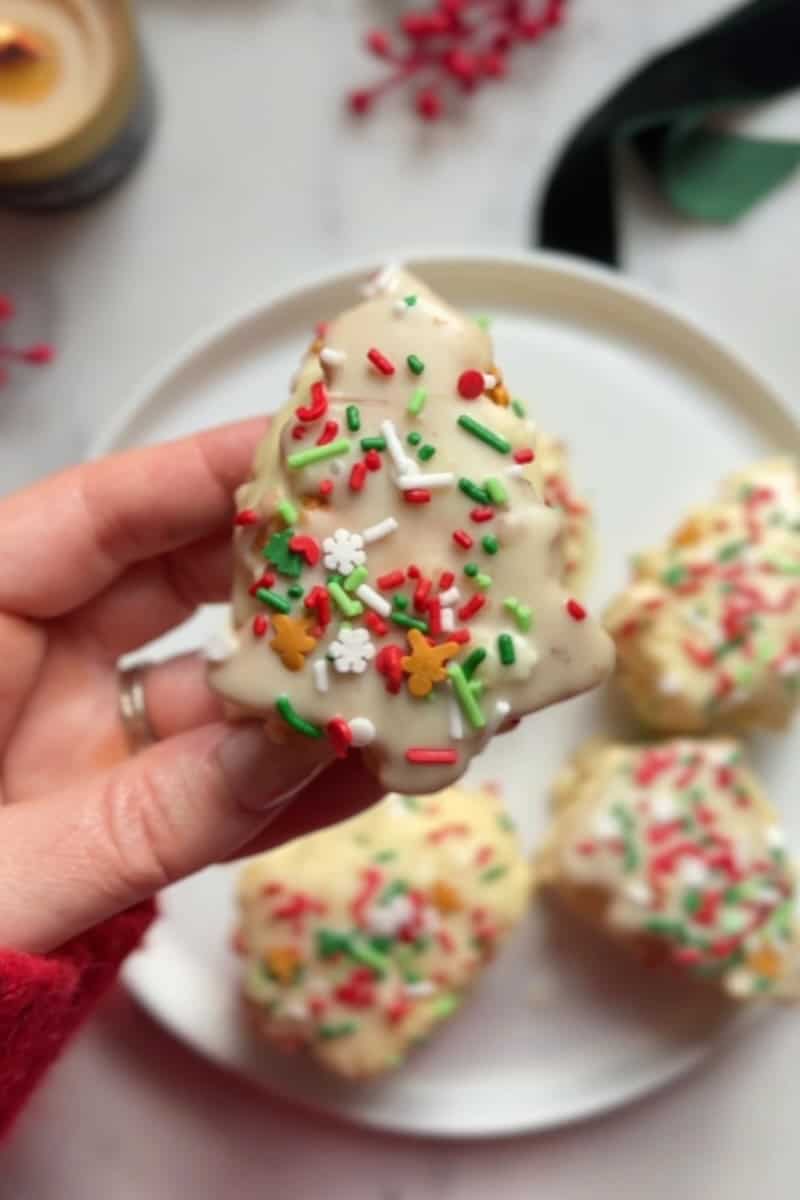
If you grew up loving Little Debbie Christmas Tree Cakes, this homemade version is about to make your whole holiday season! They taste just like the classic cakes made with soft yellow cake mix, fluffy frosting filling, and that signature thin layer of white chocolate coating, only made with better ingredients. It’s easy, fast, and way more delicious than the grocery store boxed version. And yes, they’re still just as adorable lined up like little Christmas trees on your counter! You can also make them gluten free with your favorite gluten free cake mix!
There’s something hilarious about being a full-time gut-friendly, gluten free recipe developer who still loves recreating childhood junk-food favorites. But the thing is… food is emotional. And every December, I crave those nostalgic snack cakes almost as much as I crave my morning matcha.
These homemade Christmas tree cakes hit every note of the original, right down to the white chocolate coating, but without the long ingredient list that reads like a science experiment. I’ve tested these multiple times to make them approachable for even the busiest people who still want festive treats, whether you’re hosting or simply want a better for you version the whole fam will devour.
If you love nostalgic Christmas recipes, check out my homemade gingerbread cookies, peanut butter blossoms or Grinch cake mix cookies next! For more gluten free Christmas treats, try these chocolate peppermint baked donuts or check out this list of my favorite Christmas cookies while you're at it!
Why You'll Love This Recipe
- Nostalgic flavor: Tastes just like the Little Debbie Christmas Tree Cakes we grew up on! Made with soft yellow cake, sweet cream filling, and a thin, snappy coating.
- Gluten-free & better ingredients: They can be customized to be made with your favorite cake mix, so you can make them gluten free and even dairy free if you need.
- Holiday-hosting perfect: A big hit at cookie swaps, brunches, Christmas cookie exchange boxes or your holiday parties.
- Great for gifting: Wrap individually in plastic wrap, tie with ribbon, and you’ve got the cutest edible present!
Please note this post contains affiliate links.

Little Debbie Christmas Tree Cakes Ingredients & Tested Substitutions
- Vanilla cake mix. You can use your favorite cake mix for this recipe. I use gluten-free cake mix, my favorites being Simple Mills, King Arthur, or Miss Jones.
- Eggs & butter. Regular or dairy-free butter works! Butter gives that classic soft-crumble texture reminiscent of the classic cakes.
- Vanilla extract. Vanilla creates that true Little Debbie flavor, so don’t skip!
- Powdered sugar or powdered monk fruit. Note: monk fruit is sweeter and can make the filling slightly firmer. Start with ½ cup and add more if needed.
- Milk of choice. I use almond milk but you can feel free to use whatever type of milk you have on hand.
- White chocolate chips. To create the signature white chocolate coating. You can also use a white chocolate bar if that's what you have available.
- Coconut oil. Coconut oil helps the white chocolate melt smoother.
- Christmas sprinkles. For that classic Christmas tree cake look! You can also use red and green cookie frosting.
- Vanilla frosting. If you don't want to make your own homemade frosting, feel free to use your favorite vanilla frosting instead.
Little Debbie Christmas Tree Cakes Step by Step Instructions
1. Preheat oven to 350°F and grease an 8×8 cake pan.
2. Prepare cake mix according to package instructions. Pour into the pan & bake 25–30 minutes, or until a toothpick comes out clean. Let the cake cool completely, then wrap tightly in plastic wrap and freeze overnight.


3. Make the Christmas tree shapes. Slice the cake horizontally through the middle to create two thin layers. Using a Christmas tree cookie cutter, cut out 12 trees. Place cutouts on a parchment paper lined baking sheet and freeze again while you make the frosting. If you're using store bought frosting, you can skip right to step 5.


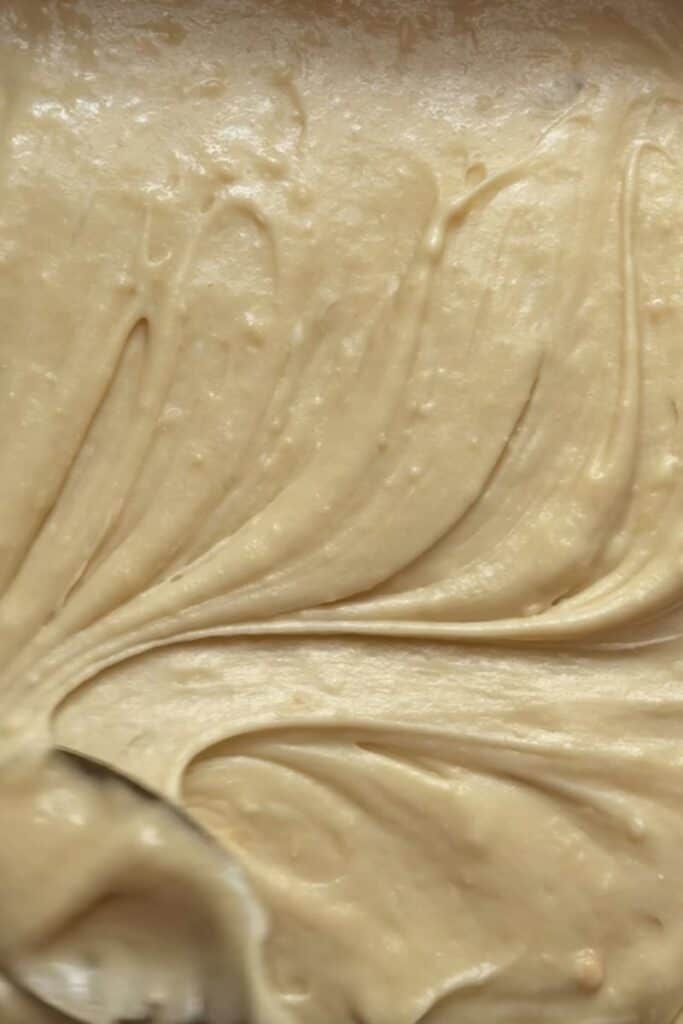
4. Make the frosting. In a bowl, mix frosting ingredients with a hand mixer. Add milk 1 tablespoon at a time if it is too thick. Too thin, add more powdered sugar 1 tablespoon at a time.
5. Assemble tree cakes. Remove trees from freezer, frost one side, and sandwich to make 6 total cakes. Freeze again.


6. Make the chocolate coating. Melt white chocolate chips and coconut oil in the microwave in 10-second increments until smooth.


7. Coat the trees. Drop each tree into the melted chocolate and coat using two forks. Place back on parchment lined baking sheets and immediately add sprinkles. Let set.


Expert Tips & Tricks
- Freeze between steps. This keeps everything firm so the coating doesn’t slide off.
- Use a small cookie cutter. A medium cutter yields 8-12 cakes; a large one will give fewer but thicker cakes.
- Coating too thick? Thin with ½ teaspoon coconut oil at a time.
- Enhance flavor Add ½ teaspoon almond extract to the frosting for that nostalgic bakery taste.
- Swap the cake mix and frosting for chocolate and make chocolate christmas tree cakes.
- Add food coloring to the white chocolate to make green Christmas trees!

How to Store Little Debbie Christmas Tree Cakes
Store the cakes in the refrigerator for up to 5 days. You can also freeze them individually wrapped for up to 2 months. When you’re ready to enjoy one, thaw it in the fridge for the best texture.
Did you have a chance to make this recipe? If so, please leave me a 5 star rating and review below. I always love and appreciate hearing from you!

Homemade Copycat Little Debbie Christmas Tree Cakes
Ingredients
For the Cake Layer
- 15 ounce package vanilla cake mix gluten free if needed
- 2-3 large eggs room temperature, will vary depending on your cake mix requirements
- 6 tablespoons butter can sub dairy free butter or oil depending on your cake mix requirements
- ⅓ cup milk or water depending on your cake mix requirements
- 1 teaspoon vanilla extract
For the Frosting
- ½ cup butter or dairy free butter
- ¾ cup powdered sugar can sub powdered monk fruit
- 1 tablespoon vanilla extract
- 3 tablespoons milk of choice
For the Chocolate Coating
- 1 ¼ cup white chocolate chips
- 1-2 tablespoons coconut oil
- Christmas sprinkles
Instructions
- Preheat oven to 350°F and grease an 8×8 cake pan.
- Prepare cake mix according to package instructions. Pour into the pan & bake 25–30 minutes, or until a toothpick comes out clean. Let the cake cool completely, then wrap tightly in plastic wrap and freeze overnight.
- Make the Christmas tree shapes. Slice the cake horizontally through the middle to create two thin layers. Using a Christmas tree cookie cutter, cut out 12 trees. Place cutouts on a parchment paper lined baking sheet and freeze again while you make the frosting. If you're using store bought frosting, you can skip right to step 5.
- Make the frosting. In a bowl, mix frosting ingredients with a hand mixer. Add milk 1 tablespoon at a time if it is too thick. Too thin, add more powdered sugar 1 tablespoon at a time.
- Assemble tree cakes. Remove trees from freezer, frost one side, and sandwich to make 6 total cakes. Freeze again.
- Make the chocolate coating. Melt white chocolate chips and coconut oil in the microwave in 10-second increments until smooth.
- Coat the trees. Drop each tree into the melted chocolate and coat using two forks. Place back on parchment lined baking sheets and immediately add sprinkles. Let set.
Notes
Expert Tips & Tricks
- Freeze between steps. This keeps everything firm so the coating doesn’t slide off.
- Use a small cookie cutter. A medium cutter yields 8-12 cakes; a large one will give fewer but thicker cakes.
- Coating too thick? Thin with ½ teaspoon coconut oil at a time.
- Enhance flavor Add ½ teaspoon almond extract to the frosting for that nostalgic bakery taste.
- Swap the cake mix and frosting for chocolate and make chocolate christmas tree cakes.
- Add food coloring to the white chocolate to make green Christmas trees!
- Use store bought frosting if you do not want to make your own at home.
How to Store Little Debbie Christmas Tree Cakes
Store the cakes in the refrigerator for up to 5 days. You can also freeze them individually wrapped for up to 2 months. When you’re ready to enjoy one, thaw it in the fridge for the best texture.
Leave a Reply