
These Hocus Pocus Spellbook Brownies are the ultimate spooky treat for Halloween! Inspired by the iconic spellbook from the movie Hocus Pocus, these rich, fudgy chocolate brownies are decorated with colorful frosting, candy eyes, and Halloween sprinkles to look just like Winifred Sanderson's beloved book of spells.
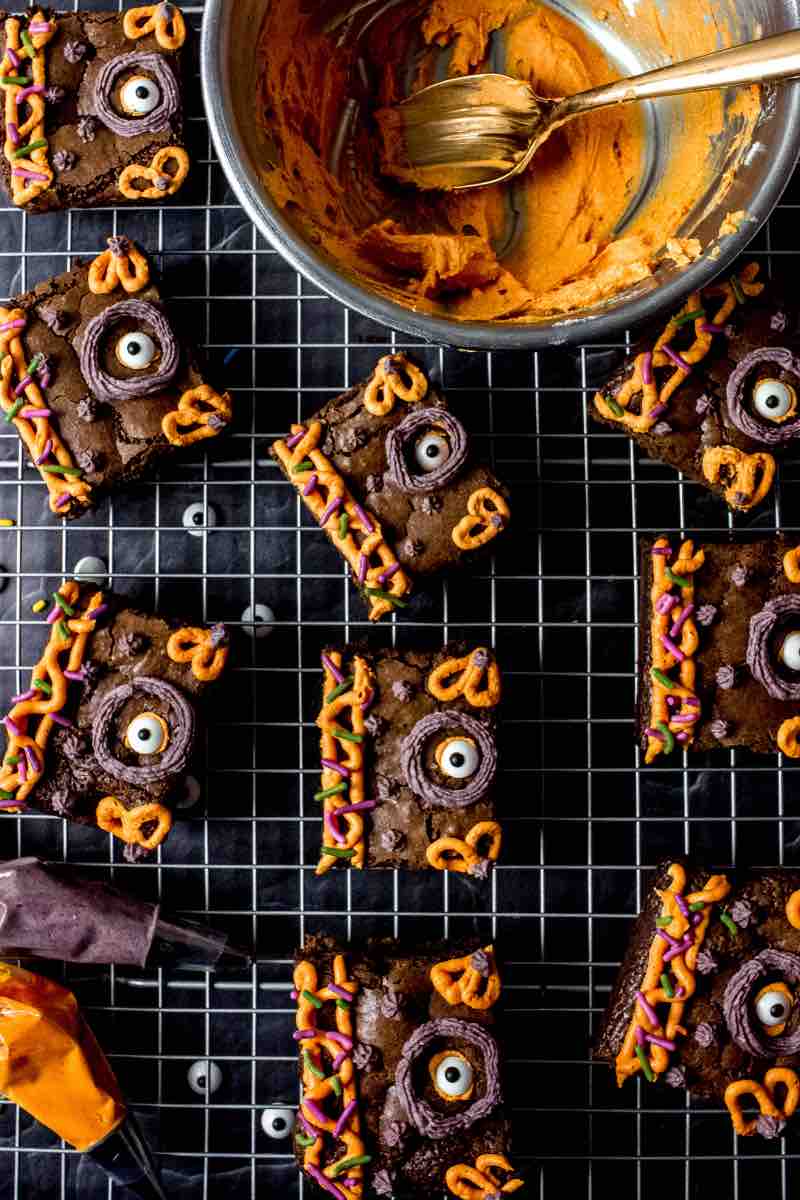
Made with simple gluten-free ingredients, these spooky Halloween brownies are just as delicious as they are fun to decorate. They're the perfect treat for a Halloween party, a Hocus Pocus movie night, or any occasion that calls for a little extra Halloween magic!
If you're looking for more easy sweet treats to bring to your Halloween parties along with these spooky eyed halloween brownies, try these Monster Eye Cookies, Dirt Pudding Cups, Chocolate Mummy Cookies or these easy Pumpkin Peanut Butter Cups.
Why You'll Love These Hocus Pocus Spellbook Brownies
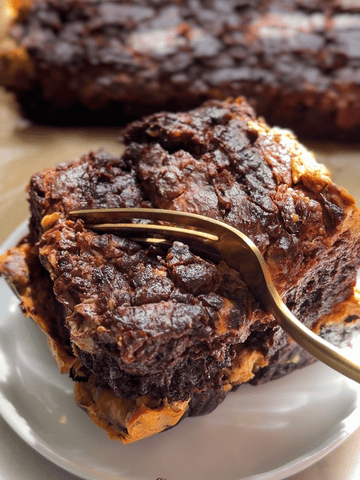
- Rich, fudgy, and gluten free: These homemade dark chocolate brownies have a decadent, fudgy center and are made with simple ingredients.
- So much fun to decorate: Orange and purple frosting, googly candy eyes, and festive sprinkles transform ordinary brownies into adorable edible spellbooks.
- Perfect for Halloween celebrations: Whether you're hosting a Halloween party, bringing treats to a school party, or watching Hocus Pocus with the whole family, these brownies are sure to get everyone into the Halloween spirit and are perfect for spooky season!
Ingredients You'll Need
These easy Halloween brownies start with a homemade gluten-free brownie batter and finish with colorful buttercream frosting.
For the Brownies
- Tapioca flour: Tapioca flour keeps these delicious brownies gluten free and helps create their signature chewy, fudgy texture.
- Unsweetened cocoa powder: Adds an extra layer of rich chocolate flavor. Cacao powder works, too!
- Dark chocolate: The secret to deliciously rich, fudgy dark chocolate brownies. Choose your favorite dark chocolate for melting.
- Coconut oil: Adds moisture and richness to the brownie batter.
- Eggs: Help bind everything together and give the brownies structure.
- Granulated monk fruit sweetener and coconut sugar: Sweeten the brownies while balancing the rich dark chocolate.
- Kosher salt and vanilla extract: Enhance the chocolate flavor.
For the Frosting and Decorations
- Butter or vegan butter: Creates the base for a smooth, creamy buttercream frosting.
- Powdered sugar: I use Paleo powdered sugar, but traditional confectioners' sugar works just as well.
- Vanilla extract and plant-based milk: Add flavor and help achieve the perfect piping consistency.
- Food coloring: Orange and purple are perfect for recreating the spellbook's magical details. I use Color Kitchen natural food coloring. Feel free to play around and use different colors if you like!
- Edible candy eyes: The most important decoration for bringing these spooky spellbooks to life is the edible candy eyes!
- Halloween sprinkles: Add a festive finishing touch to each brownie.

How to Make Hocus Pocus Spellbook Brownies
These spooky brownies come together in three simple stages: baking, frosting, and decorating.
Step 1: Make the Fudgy Brownies
Preheat your oven to 350°F and line an 8-inch metal baking pan with parchment paper, leaving an overhang for easy removal.
Whisk together the tapioca flour and cocoa powder. Separately, melt the dark chocolate and coconut oil over low heat until smooth.
In a large bowl, beat the eggs, monk fruit sweetener, and coconut sugar until light and smooth. Mix in the vanilla, salt, melted chocolate, and dry ingredients until a thick brownie batter forms.
Pour into your prepared pan and bake for approximately 20–25 minutes, until the center is set and a toothpick comes out with a few moist crumbs.
Step 2: Prepare the Frosting
While the brownies bake, beat the butter, powdered sugar, and vanilla until smooth. Add plant-based milk gradually until the frosting is thick and creamy.
Divide the frosting between two bowls. Color one orange and the other purple, then transfer each color to a separate piping bag.
Step 3: Decorate Your Spellbooks
Once the brownies are completely cooled, cut them into nine squares.
Attach a candy eye to each brownie with a small dab of orange frosting. Pipe orange loops and lines to recreate the spellbook's intricate details, then use purple frosting to outline the eye and add decorative dots.
Finish with Halloween sprinkles along the spine of each book.
Your Hocus Pocus Spellbook Brownies are ready to cast a delicious spell!
Tips for the Best Halloween Brownies
- Let the brownies cool completely. Decorating warm brownies will cause the frosting to melt. You can refrigerate them for 20–30 minutes after they've cooled slightly to make decorating easier.
- Use a parchment paper overhang. This makes removing the brownies from the pan and cutting them into neat squares much easier.
- Don't overbake. For perfectly fudgy brownies, look for a set center and a toothpick with a few moist crumbs rather than wet batter.
- Keep the frosting thick. Add milk a little at a time so your piped details hold their shape.
- Have fun with the decorating! The spellbooks don't need to look identical. Each one can have its own spooky personality, just don't skip the googly eyes!
Substitutions and Variations
Can I use a boxed brownie mix?
Absolutely! If you're short on time, you can make these easy Halloween brownies using your favorite gluten-free boxed brownie mix or favorite homemade brownie recipe. Simply bake according to the package directions, cool completely, and follow the decorating instructions.
Can I use store-bought frosting?
Yes! A premade vanilla frosting is a great way to save time. Divide it into two bowls and mix in your desired food coloring before decorating.
Can I make these with regular powdered sugar?
Yes. Traditional confectioners' sugar works perfectly. You can also make a powdered alternative by blending granulated monk fruit sweetener until finely powdered, although the finished frosting texture may vary.
Frequently Asked Questions
Can I make these Halloween brownies ahead of time?
Yes! Bake the brownies the day before your Halloween party and store them tightly covered at room temperature. Decorate them the next day for a fun, stress-free Halloween activity.
Do I need special piping equipment?
Not necessarily! While piping bags with small round and star tips make decorating easier, you can also use a freezer bag with a tiny corner snipped off to pipe the frosting.
Are these Hocus Pocus brownies gluten free?
The homemade brownie recipe is made without wheat flour, using tapioca flour instead. Just be sure your chocolate, sprinkles, candy eyes, and other decorations are certified gluten free if needed.
How to Store Hocus Pocus Spellbook Brownies
Store decorated brownies in an airtight container at room temperature for up to 2 days in a cool environment, or refrigerate for up to 5 days. Allow refrigerated brownies to come to room temperature before serving for the best fudgy texture.
If stacking, place a sheet of parchment paper between layers once the frosting has firmed up to help protect the decorations.
Did you have a chance to make this recipe? If so, please leave me a 5 star rating and review below. I always love and appreciate hearing from you!

Spooky Halloween Treat Easy Spellbook Brownies
Equipment
- 8x8 Brownie Pan
- Cooling Rack
- Electric or Stand Mixer preferable
- 2 clear piping bags
- Small round + small star piping tips
Ingredients
For the Brownies
- 6 tablespoons tapioca flour
- 4 tablespoons unsweetened cocoa powder
- 12 ounces dark chocolate coarsely chopped
- 6 tablespoons coconut oil
- 4 large eggs
- ⅔ cup granulated monk fruit sweetener can sub for cane sugar
- ½ cup coconut sugar
- 1 teaspoon kosher salt
- 2 teaspoons vanilla extract
For the Frosting
- ⅓ cup butter or vegan butter
- 3 cups Paleo powdered sugar**
- 1 ½ teaspoons vanilla extract
- 1-2 tablespoons milk of choice
- 1 Color Kitchen Orange Packet
- ½ Color Kitchen Pink + ½ Color Kitchen Blue Packets
Additional Decorations
- Edible candy eyes
- colorful sprinkles
Instructions
Make the Brownies
- Prepare the oven and pan. Preheat oven to 350°F. Line an 8x8-inch baking pan with overlapping sheets of parchment paper, leaving an overhang for easy removal.
- Combine the dry ingredients. In a medium bowl, whisk together the tapioca flour and cocoa powder until no lumps remain.
- Melt the chocolate. In a small saucepan over low heat, melt the dark chocolate and coconut oil, stirring until smooth. Remove from heat. Do not allow the mixture to boil.
- Beat the eggs and sweeteners. In a large bowl, use an electric mixer on medium-high speed to beat the eggs, monk fruit sweetener, and coconut sugar until light and smooth, approximately 3–4 minutes.
- Combine the wet ingredients. Beat in the salt and vanilla extract, followed by the melted chocolate mixture. Scrape down the sides of the bowl as needed.
- Finish the batter. Add the tapioca flour mixture and beat until combined. Increase the speed to medium-high and mix for another 30 seconds, until the batter is thick and holds its shape.
- Bake. Spread the brownie batter evenly into the prepared pan. Bake for 20–25 minutes, or until the center is set and a toothpick inserted into the center comes out with a few moist crumbs. Allow the brownies to cool completely before decorating.
Make the Frosting
- Mix the frosting. Using an electric mixer, beat the softened butter, powdered sugar, and vanilla until combined. Add plant-based milk, 1 tablespoon at a time, until thick, smooth, and pipeable.
- Color the frosting. Divide the frosting evenly between two bowls. Mix the orange food coloring into one bowl and the pink and blue coloring into the other to create purple frosting.
- Prepare piping bags. Fit one piping bag with a small round tip and the other with a small star tip. Fill the round-tip bag with orange frosting and the star-tip bag with purple frosting.
Decorate the Brownies
- Cut the brownies. Once completely cooled, remove the brownies from the pan using the parchment paper overhang and slice into 9 equal squares.
- Add the candy eyes. Pipe a small dab of orange frosting onto the back of each candy eye and gently press one onto each brownie.
- Pipe the orange details. Using the orange frosting, pipe two small pretzel-shaped loops on the upper and lower right corners. Along the left edge, pipe two parallel lines with a squiggle between them to create the spellbook's spine.
- Add the purple details. Pipe a circle of purple frosting around each candy eye. Add two small dots inside each orange loop and a few additional dots across the brownie. bag and pipe a circle around the eye.
- Finish with sprinkles. Decorate the spine of each spellbook with Halloween sprinkles. Serve and enjoy!
Notes
Recipe Notes
- Powdered sugar: To make your own powdered monk fruit sweetener, blend 3 cups of granulated monk fruit sweetener for 30–40 seconds, or until finely powdered. Results may vary by brand.
- Store-bought frosting: Premade vanilla frosting can be substituted to save time.
- Brownie mix shortcut: Use your favorite gluten-free boxed brownie mix, following the package instructions, before decorating.
- Cooling: To speed up cooling, transfer slightly cooled brownies to the refrigerator for 20–30 minutes. Make sure they are completely cool before frosting.
- Storage: Store in an airtight container at room temperature for up to 2 days or refrigerate for up to 5 days.
Leave a Reply